¶ 1. About Print and Cut
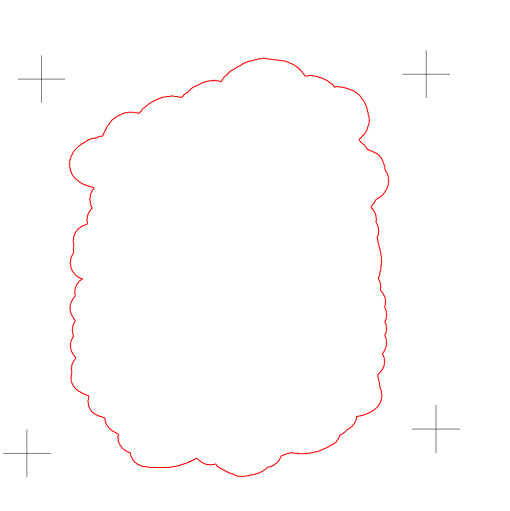
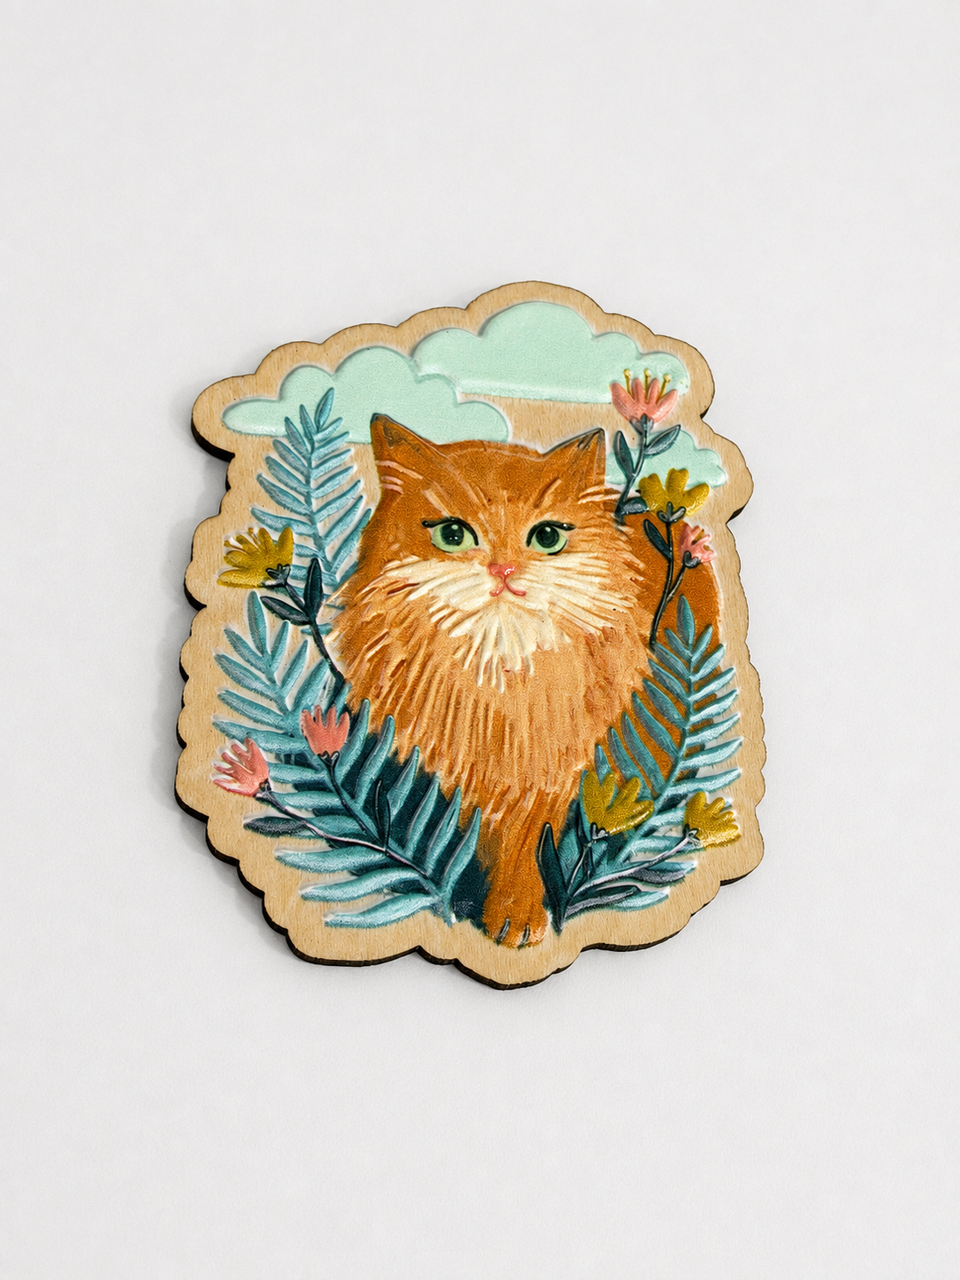
Print and Cut lets you print a design first and then cut it using a generated cut path.
After completing the workflow, you will have:
- A print job
- An SVG file for cutting
The complete workflow is:
Prepare the design → Place the design in Alignment → Configure the cut path → Check the registration marks → Save the SVG → Print → Cut using the SVG
¶ 2. Before You Start
¶ 2.1 Prepare the Equipment and Material
Make sure that:
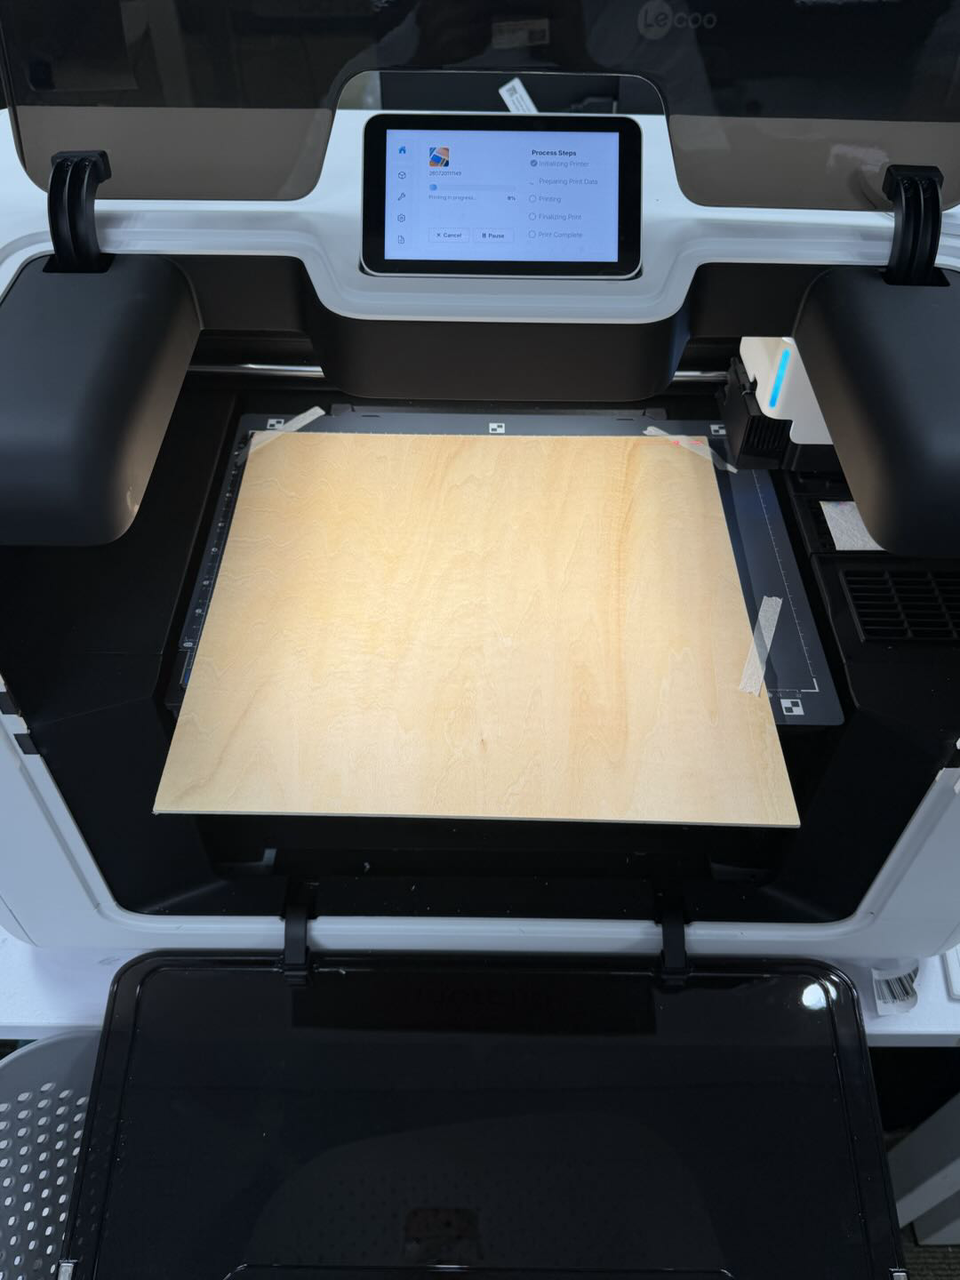
- The printer is connected and ready to print.
- The material fits within the current print area.
- A compatible cutting device is available.
- The material dimensions meet both the printing and cutting requirements.
¶ 2.2 Prepare the Design
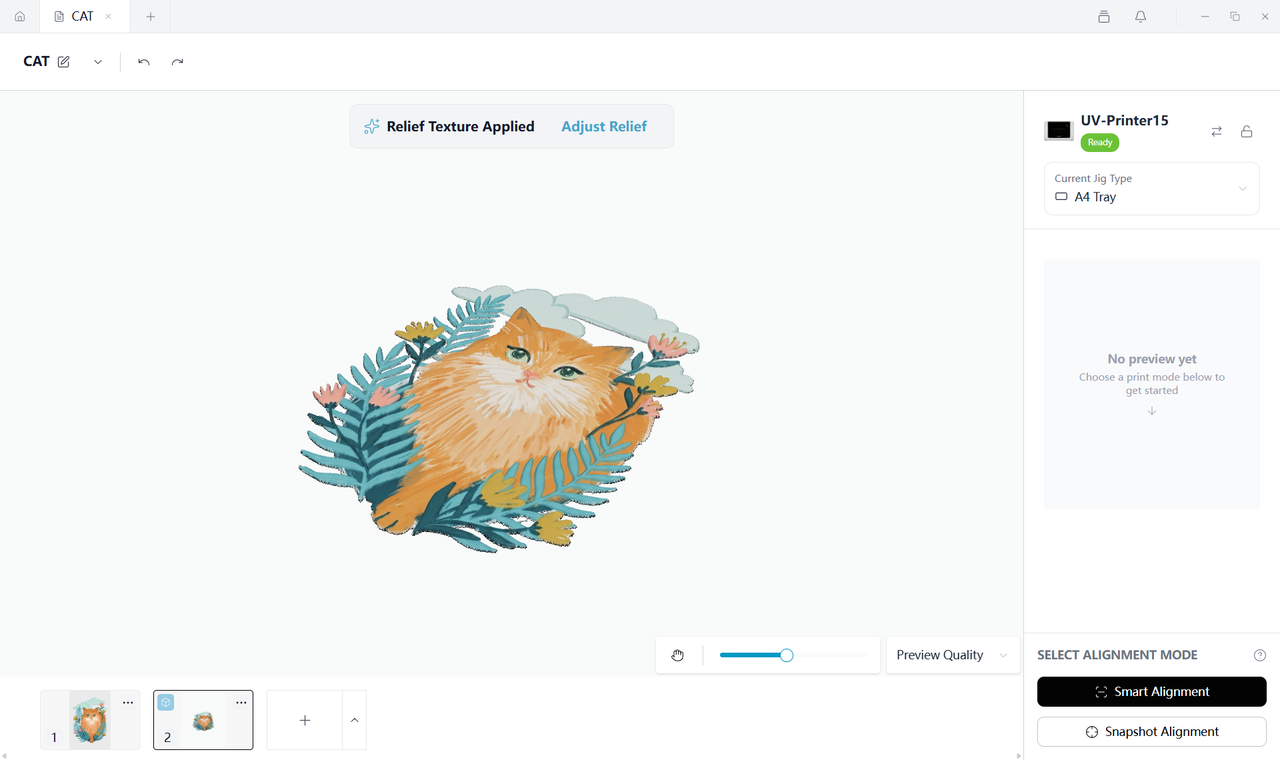
- Create or open a design project.
- Import or create the artwork to be printed.
- For better cut-path generation, use artwork with clear edges and a complete subject.
- To cut along the edge of the artwork, use an image with a transparent background whenever possible.
¶ 2.3 Place the Design
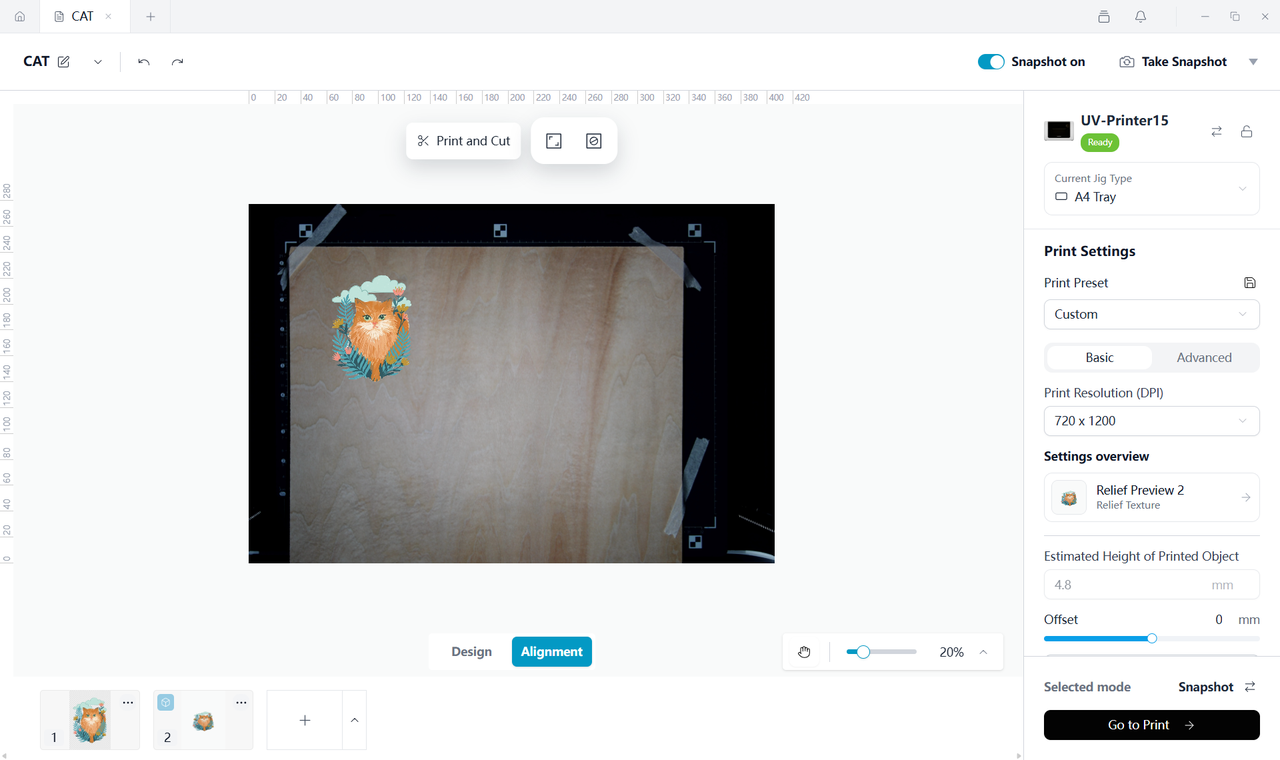
- Open Alignment and enter Mapping mode.
- Place the design inside the printable area.
- Make sure the design does not extend beyond the print boundary.
- Complete the print-area and margin settings.
¶ 3. Complete Your First Print and Cut
¶ 3.1 Open Print and Cut
- Finish placing the design in Alignment.
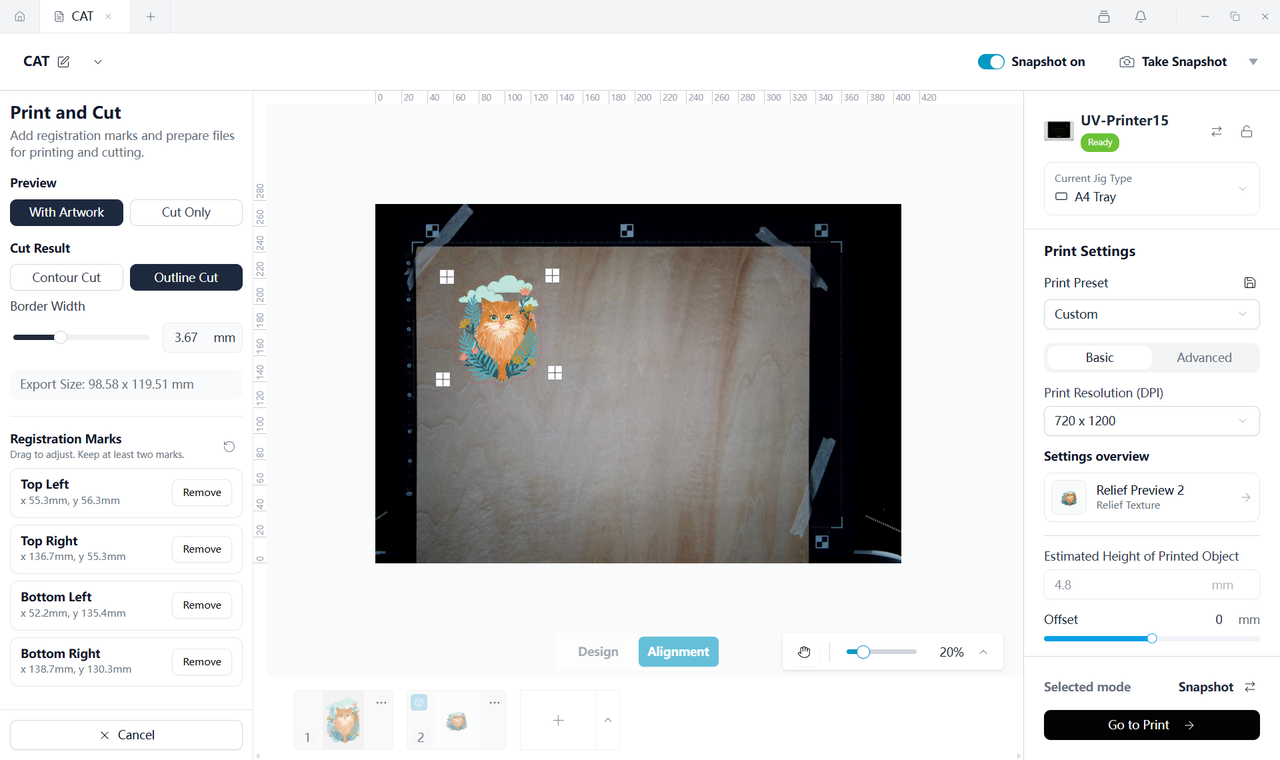
- Select Print and Cut from the toolbar.
- Wait for the system to generate the cut path.
Note
Do not repeatedly select the button or leave the page while the cut path is being generated.
¶ 3.2 Preview the Cut Path
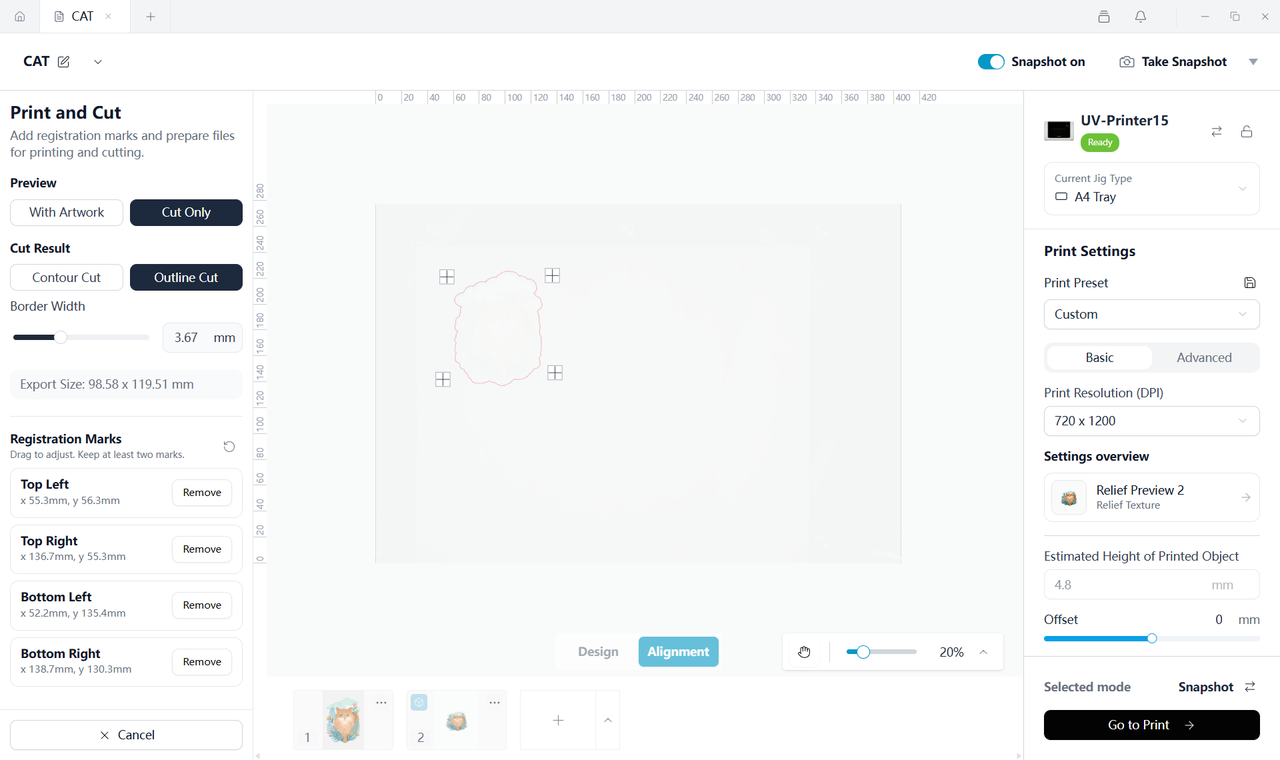
Two preview options are available:
- With Artwork – Displays the artwork and cut path together so you can check their alignment.
- Cut Only – Displays only the cut path so you can check whether the outline is complete.
The preview option does not affect the exported cut path. You do not need to switch views after every adjustment.
¶ 3.3 Select a Cutting Method
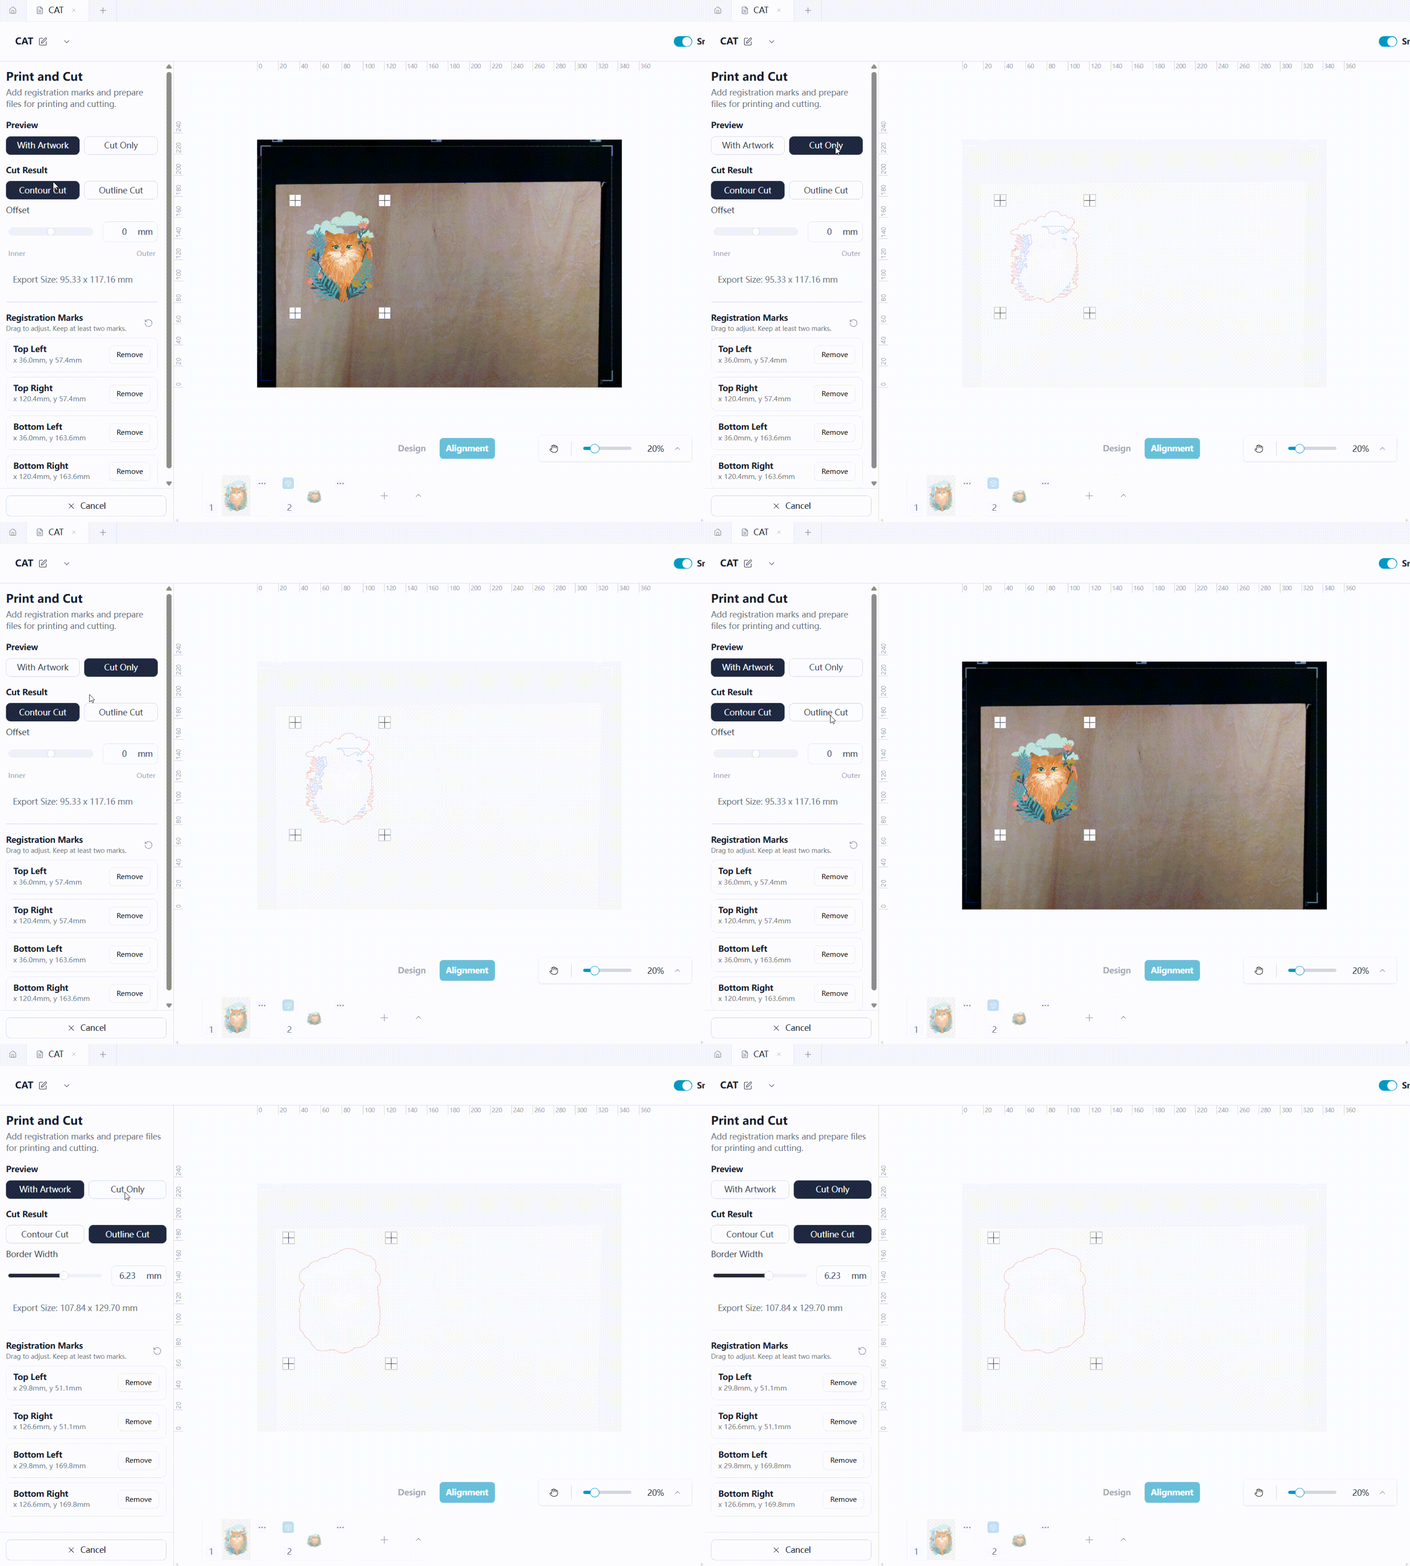
- Contour Cut – Follows the outer edge of the artwork. Recommended for most images.
- Outline Cut – Creates a single outer boundary around the artwork. Use this option when the design requires a surrounding border.
¶ 3.4 Adjust the Cut Path
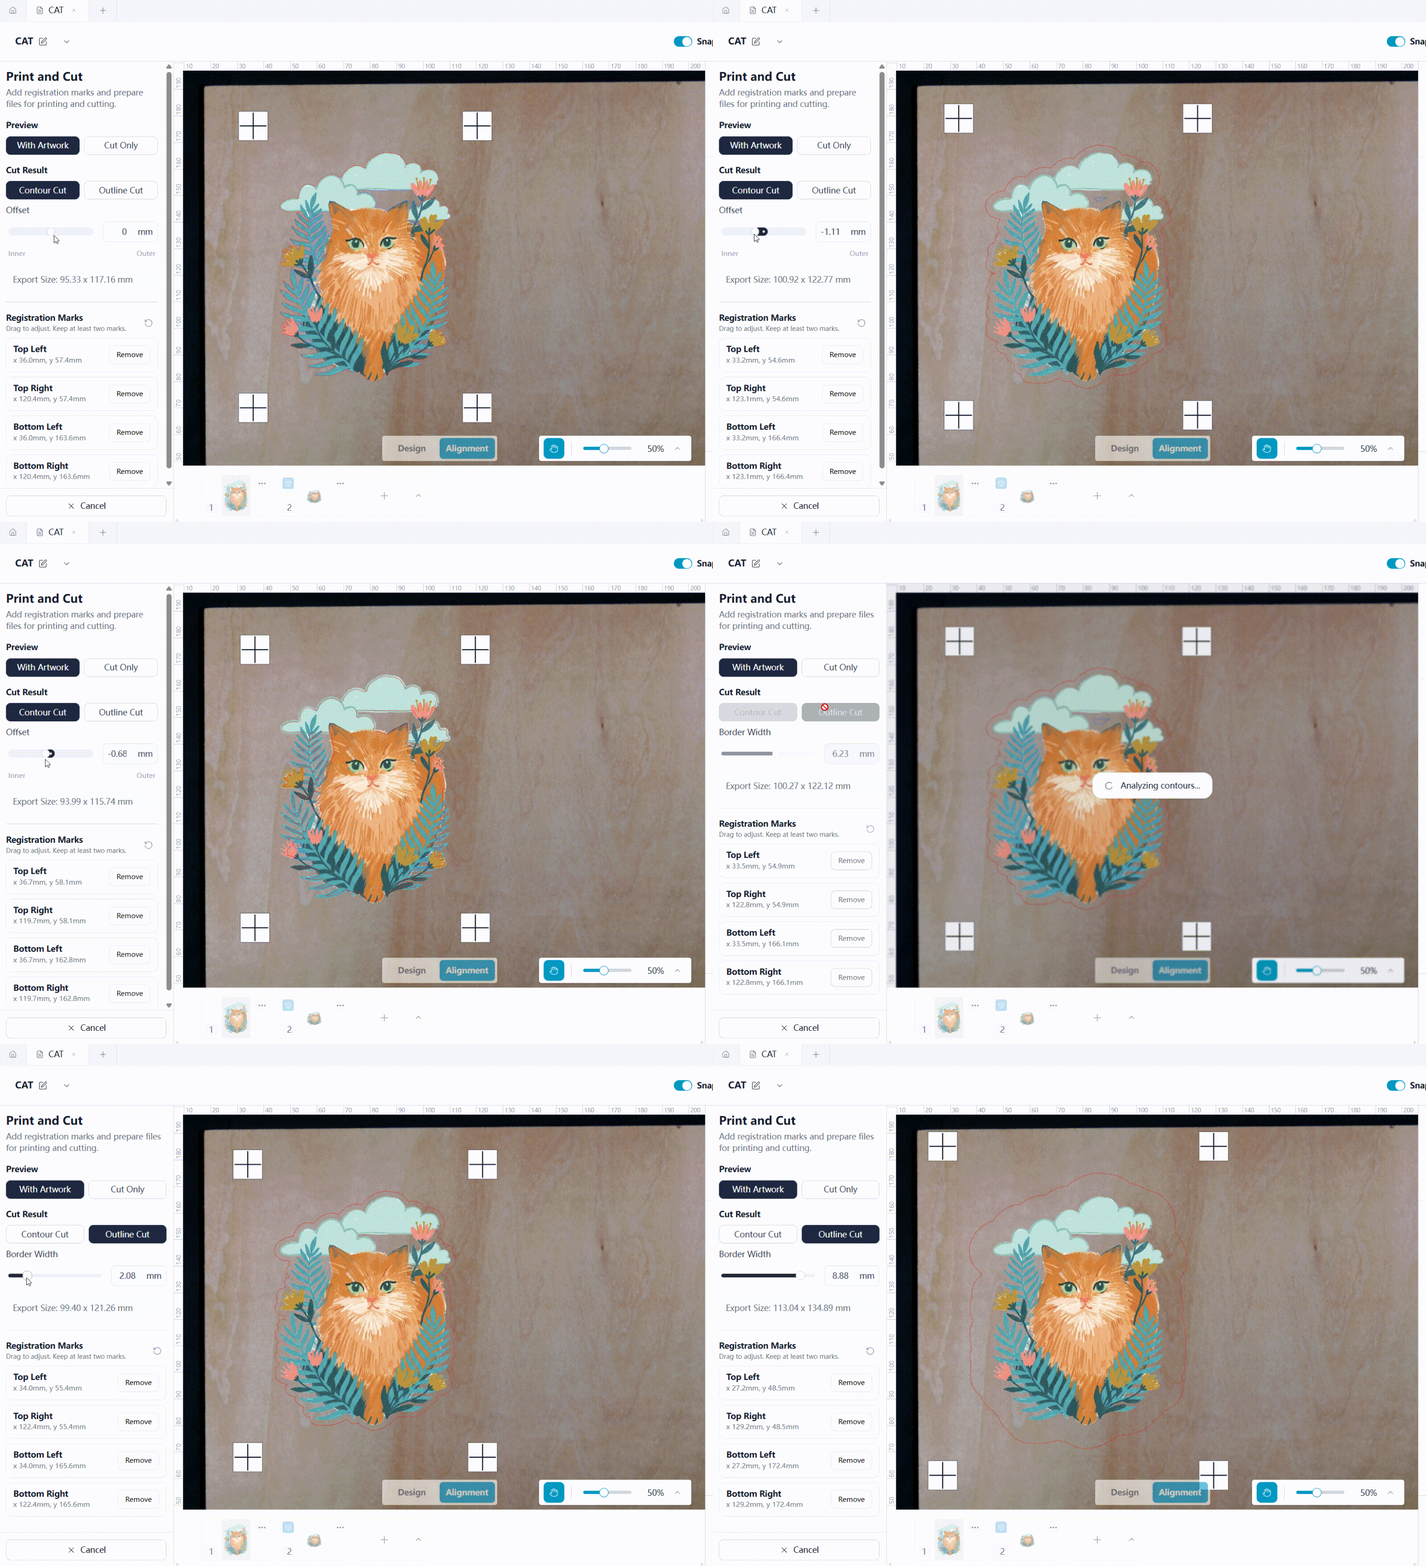
- Offset – Moves the cut path inward or outward. Moving it outward increases the area retained around the artwork. Moving it inward brings the cut path closer to the subject.
- Border Width – Adjusts the width of the outer border created by Outline Cut.
- Export Size – Displays the dimensions of the final exported area. Use this value to confirm that the SVG size matches the material.
After changing a setting, check the preview to confirm that the cut path is complete and correctly positioned.
¶ 3.5 Check the Registration Marks
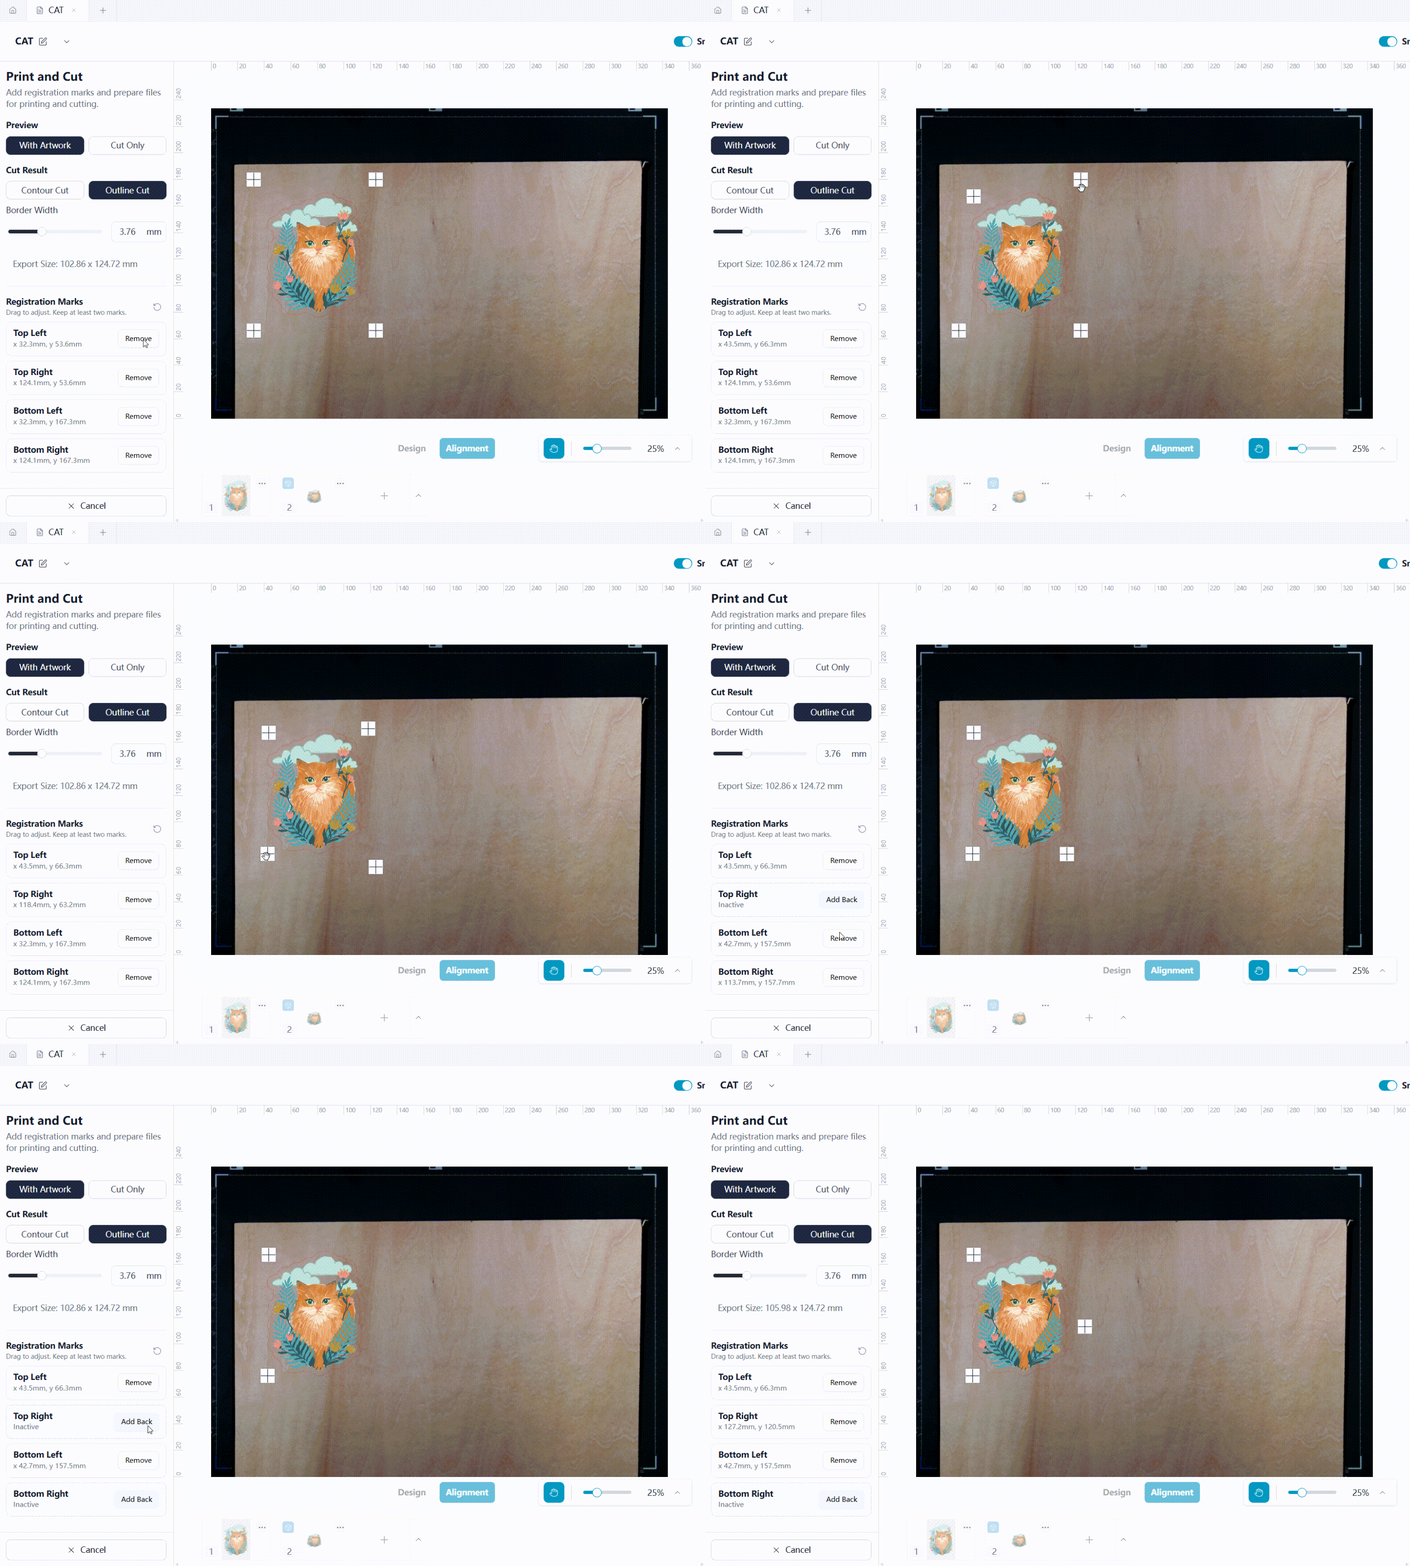
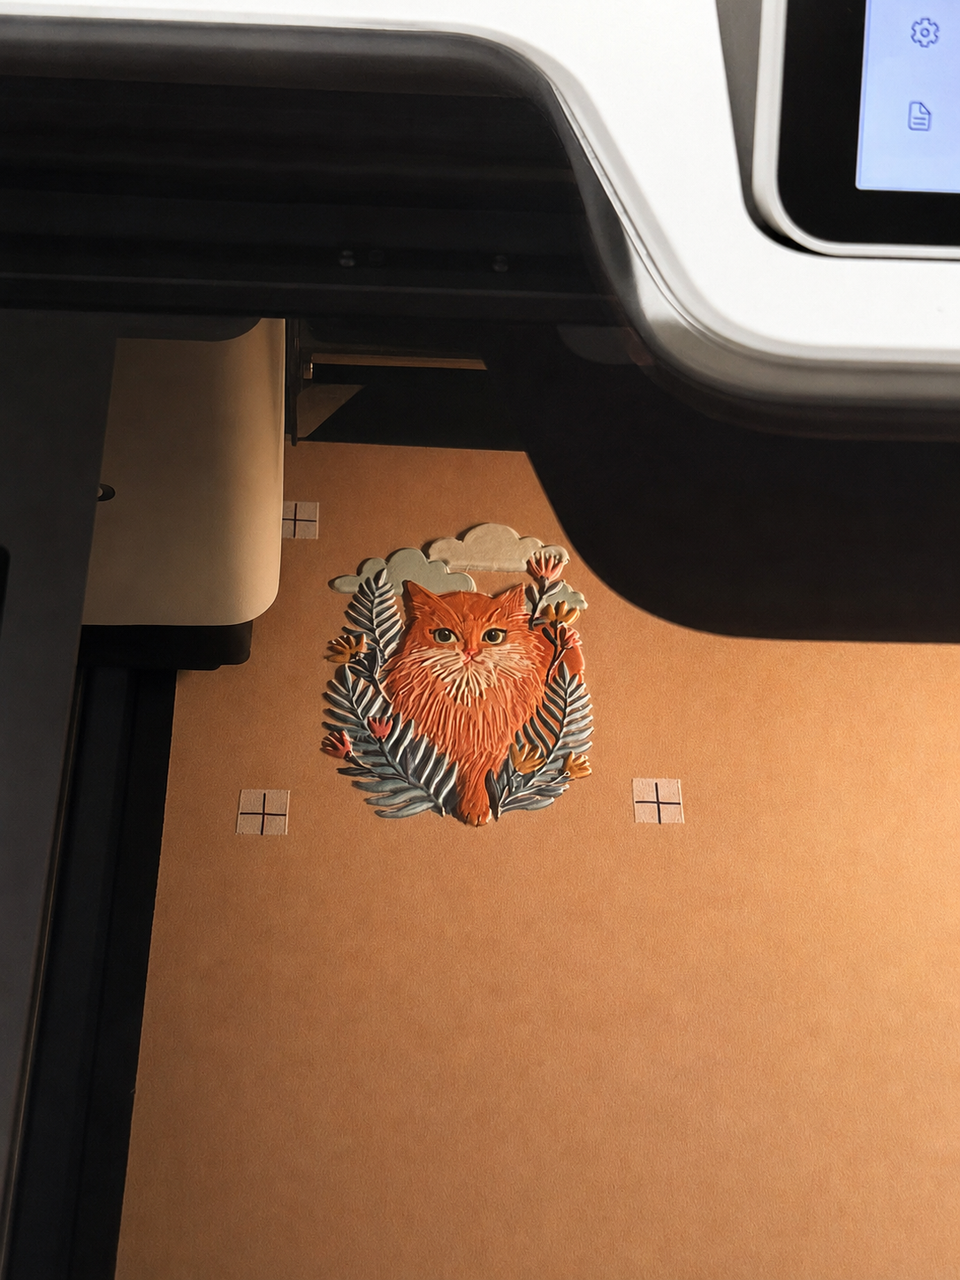
Registration marks help the cutting device align the printed artwork with the cut path.
Before continuing, make sure that:
- At least two registration marks remain enabled.
- Every enabled registration mark is within the printable surface.
- No registration mark is displayed in red.
- The registration marks are not covered by the artwork or other content.
You can:
- Drag a registration mark to reposition it.
- Select Remove to remove a mark.
- Select Add Back to restore a removed mark.
- Select the Reset button to restore the default positions.
Important
A registration mark displayed in red is invalid and must be repositioned before you can continue.
¶ 3.6 Save the Cut File and Print
- Check the cut path, Export Size, and registration marks.
- Select Go to Print.
- Choose a save location and save the SVG file.
- Review the print preview and Print Settings.
- Confirm the settings and create the print job.
- View the job status on the print job page.
Important
Do not cancel the SVG save operation. If saving is canceled, the print job will not be created.
Before continuing, confirm that:
- The cutting SVG has been saved.
- The print job has been created successfully.
¶ 3.7 Complete the Cut
- Wait for the print job to finish.
- Make sure the artwork and registration marks are complete and clearly visible.
- Import the saved SVG into the cutting device software.
- Keep the SVG at its original size, orientation, and proportions.
- Follow the cutting device instructions to detect the registration marks.
- Review the cutting preview and start cutting.
Note
Connection methods, registration-mark detection, and cutting parameters vary by device. Refer to the instructions provided with the cutting device.
|
|
|
¶ 4. Cutting Settings
| Setting | Use | Recommendation |
|---|---|---|
| With Artwork | Checks the alignment between the artwork and cut path. | Use as the default preview. |
| Cut Only | Checks the cut path separately. | Review once before continuing. |
| Contour Cut | Cuts along the outer edge of the artwork. | Recommended for most designs. |
| Outline Cut | Creates a single outer boundary around the artwork. | Use when a surrounding border is required. |
| Offset | Moves the cut path inward or outward. | Start with 0 mm. |
| Border Width | Adjusts the width of the Outline Cut border. | Adjust gradually while checking the preview. |
| Registration Marks | Align the printed artwork with the cut path. | Keep at least two valid registration marks. No mark should appear in red. |
¶ 5. Frequently Asked Questions
¶ 5.1 Why can't I find or select Print and Cut?
The project may not be in Mapping mode, or the current print area may not contain a valid design.
Open Mapping mode, place the design inside the printable area, and complete any active editing operation.
¶ 5.2 Why does the App keep showing that the cut path is being updated?
The system may still be analyzing the artwork, especially if its edges are complex.
Wait for cut-path generation to finish. Do not repeatedly select the button or leave the page.
If it does not finish after an unusually long time, close and reopen Print and Cut.
¶ 5.3 Why does the App say there is no content to export?
The design may be outside the current print area.
Move the design into the printable area, then check its size and position.
¶ 5.4 Why does Outline Cut report multiple disconnected outlines?
The design may contain several separate subjects without a continuous outer area.
Use Contour Cut, or edit the design so that its outer area forms one continuous shape.
¶ 5.5 Why is a registration mark displayed in red?
The registration mark may be outside the printable surface or in an invalid position.
Drag the mark to a valid position, or use Remove, Add Back, or the Reset button to configure the marks again.
¶ 5.6 Why is Go to Print unavailable?
The cut path may still be generating, or fewer than two valid registration marks may remain.
Wait for cut-path generation to finish and make sure that at least two registration marks are valid.
¶ 5.7 Why can't I submit the print job?
The printer may be busy, offline, or in an error state.
Check the printer status in Device Center and try again when the printer is ready to print.
¶ 5.8 What happens if I cancel while saving the SVG?
The SVG will not be saved, and the Print and Cut workflow will stop before creating the print job.
Select Go to Print again and complete the SVG save operation.
¶ 5.9 Why is the cut misaligned with the printed artwork?
The SVG may have been resized or rotated, the material may have moved, or the registration marks may not have been detected accurately.
Check the original SVG dimensions, material orientation, registration marks, and cutting-device calibration.
¶ 5.10 Why does the SVG size change after import?
The cutting software may automatically scale the SVG or fit it to the page.
Use the original dimensions or a scale of 100%, and disable automatic scaling or page fitting.
¶ 5.11 Why doesn't the cut path follow the artwork as expected?
The image background, subject edges, or cut-path settings may not be suitable.
Use Cut Only to inspect the path. Whenever possible, use an image with a transparent background, then adjust the cutting method or Offset.
¶ 6. Printing, Cutting, and Safety Notes
- Do not crop, mirror, resize, or otherwise modify the generated SVG.
- After printing, make sure all registration marks are complete and clearly visible.
- Secure the material before cutting to prevent movement.
- When using a new material, perform a small test cut first.
- Select the blade, power, speed, and other cutting parameters according to the cutting device and material instructions.
- Follow all safety requirements provided with the cutting device.
- If the cut is misaligned, check the SVG dimensions, material orientation, registration marks, and cutting-device calibration first.