¶ 1. Overview
This page explains how to use Jigs in Morpho Studio Alignment to accurately position your design before printing.
The following jig types are currently supported:
- A4 Tray
- A3 Printbed
- Electrostatic Mat
Additional jig types will be introduced in future releases.
¶ 2. What Are Jigs?
Jigs are alignment templates that help you position your artwork accurately on the printing surface.
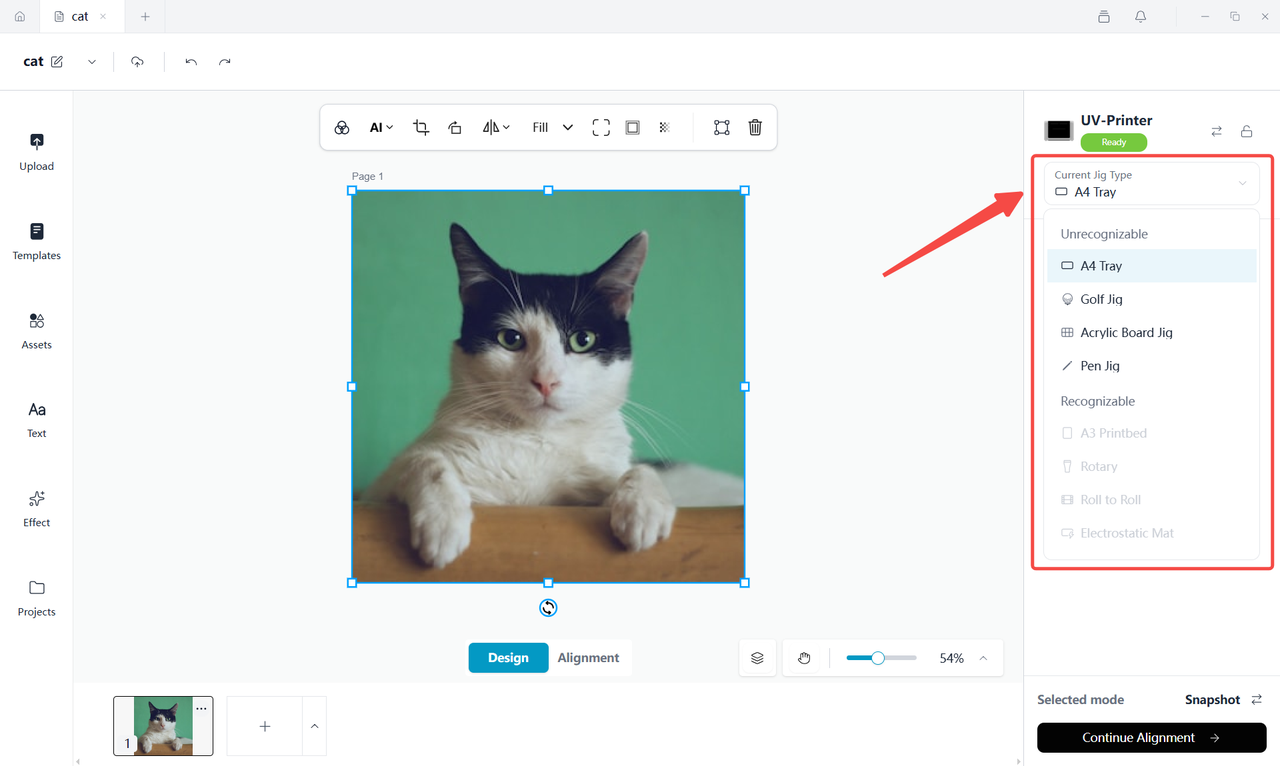
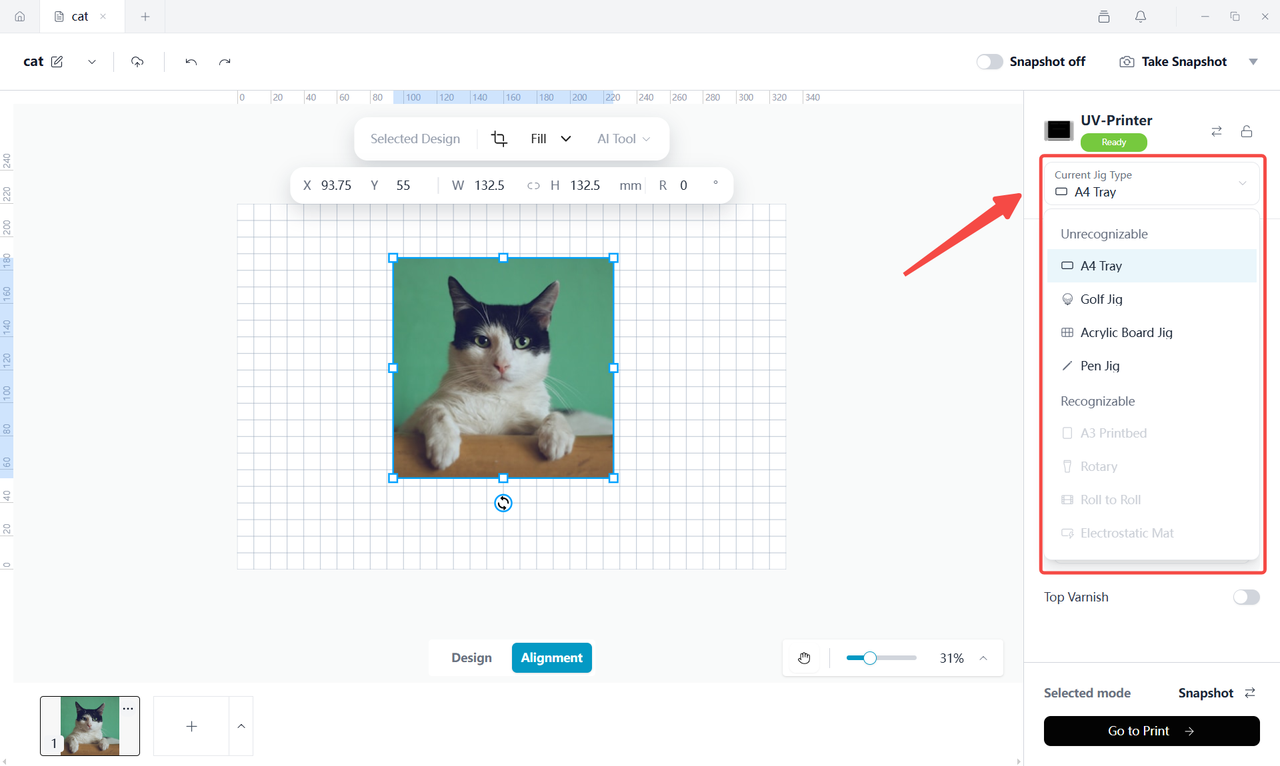
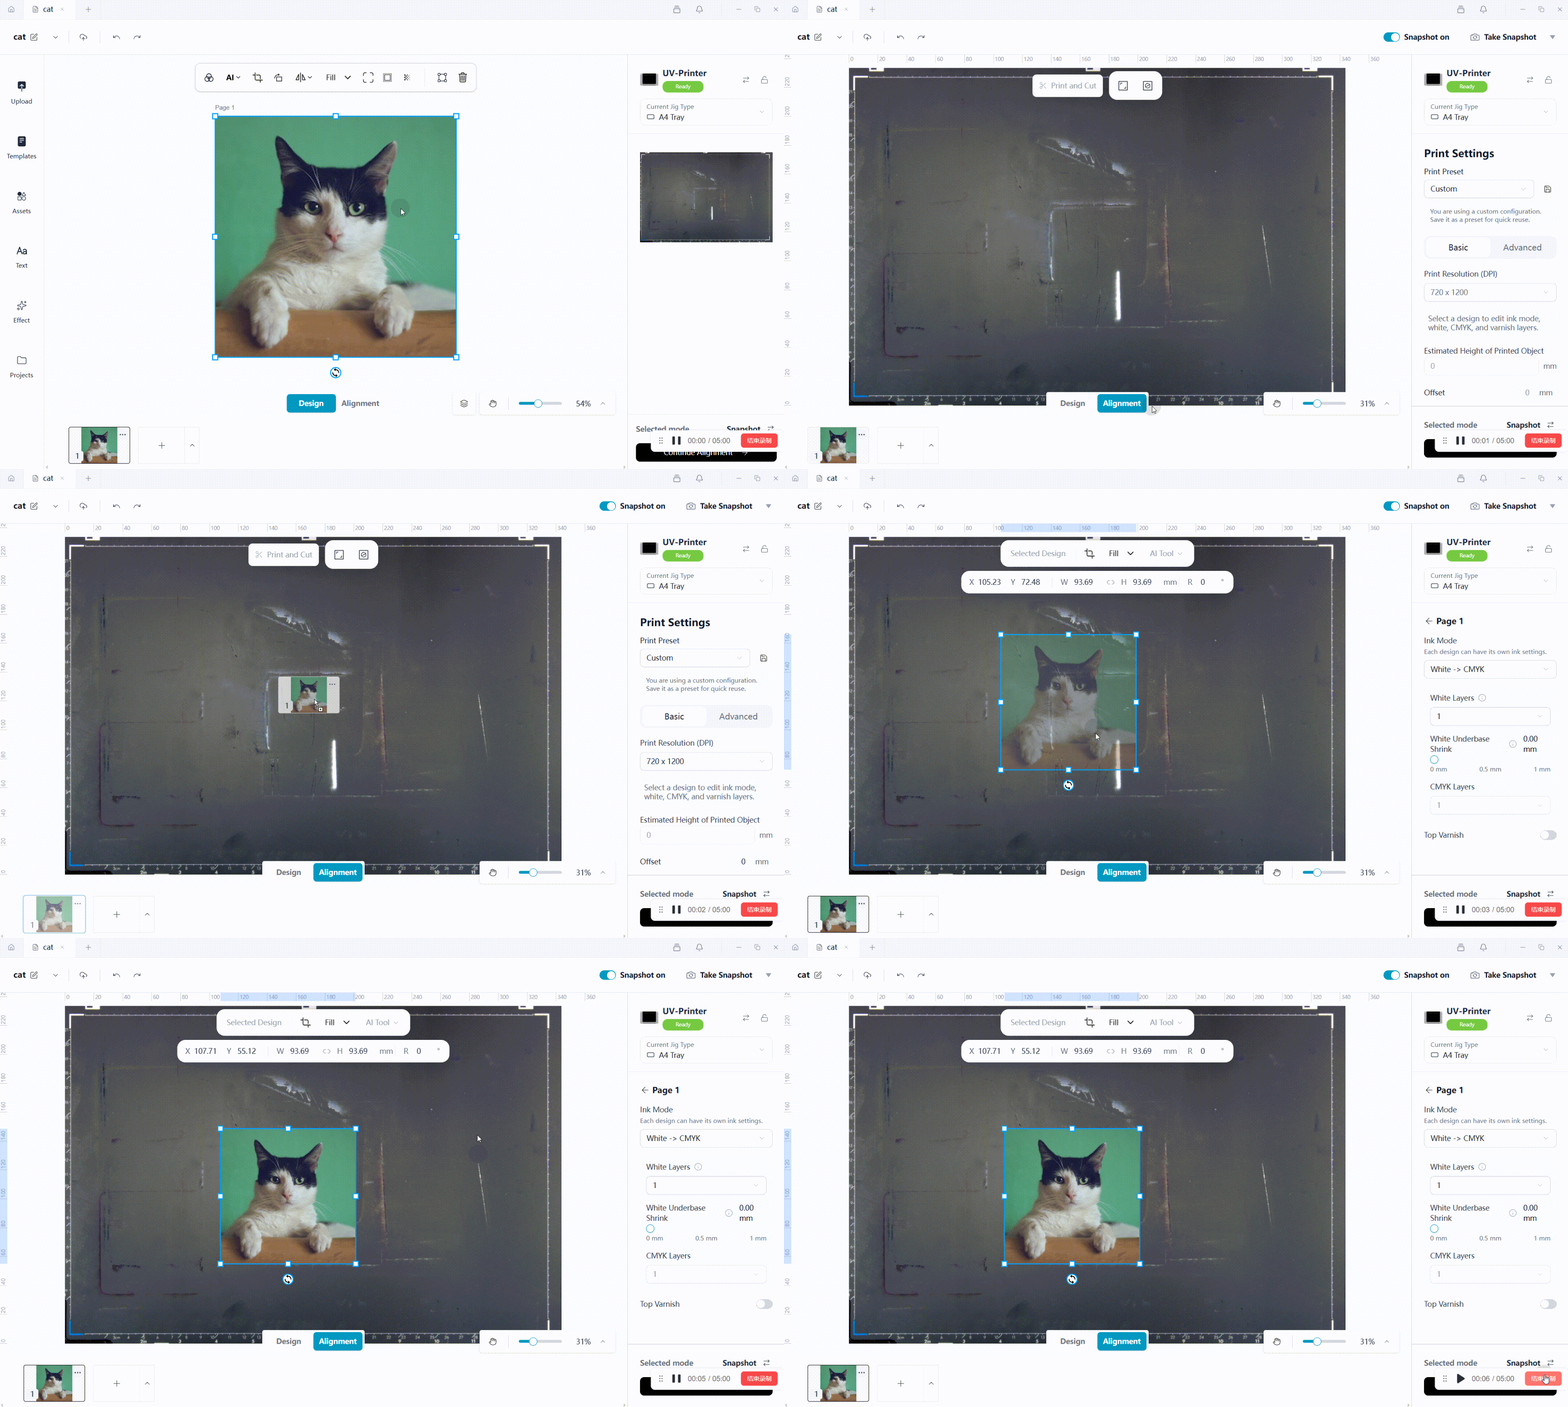
After selecting a jig in Design or Alignment, Morpho Studio displays the outline of the selected jig on the Alignment canvas. This reference helps you verify that your artwork is positioned correctly before printing.
 |
 |
¶ 3. Supported Jig Types
| Jig | Recommended Use |
|---|---|
| A4 Tray | Standard alignment and printing using the A4 tray. |
| A3 Printbed | Large-format alignment and printing using the A3 printbed. |
| Electrostatic Mat | Printing thin, lightweight, or flexible materials secured by electrostatic adsorption. |
¶ 4. Before You Start
Before using Jigs, make sure that:
- The correct A4 Tray, A3 Printbed, or Electrostatic Mat is installed.
- The object or material has been placed on the selected jig.
- Your design has been imported into Morpho Studio.
- The jig orientation matches the orientation shown in the software.
- The object or material is flat and properly positioned without lifting or shifting.
¶ 5. Open Alignment
- Open Morpho Studio.
- Create a new project or open an existing one.
- Import the artwork to be printed.
- Open the Alignment page.
- Locate the Jigs panel.
¶ 6. Select a Jig
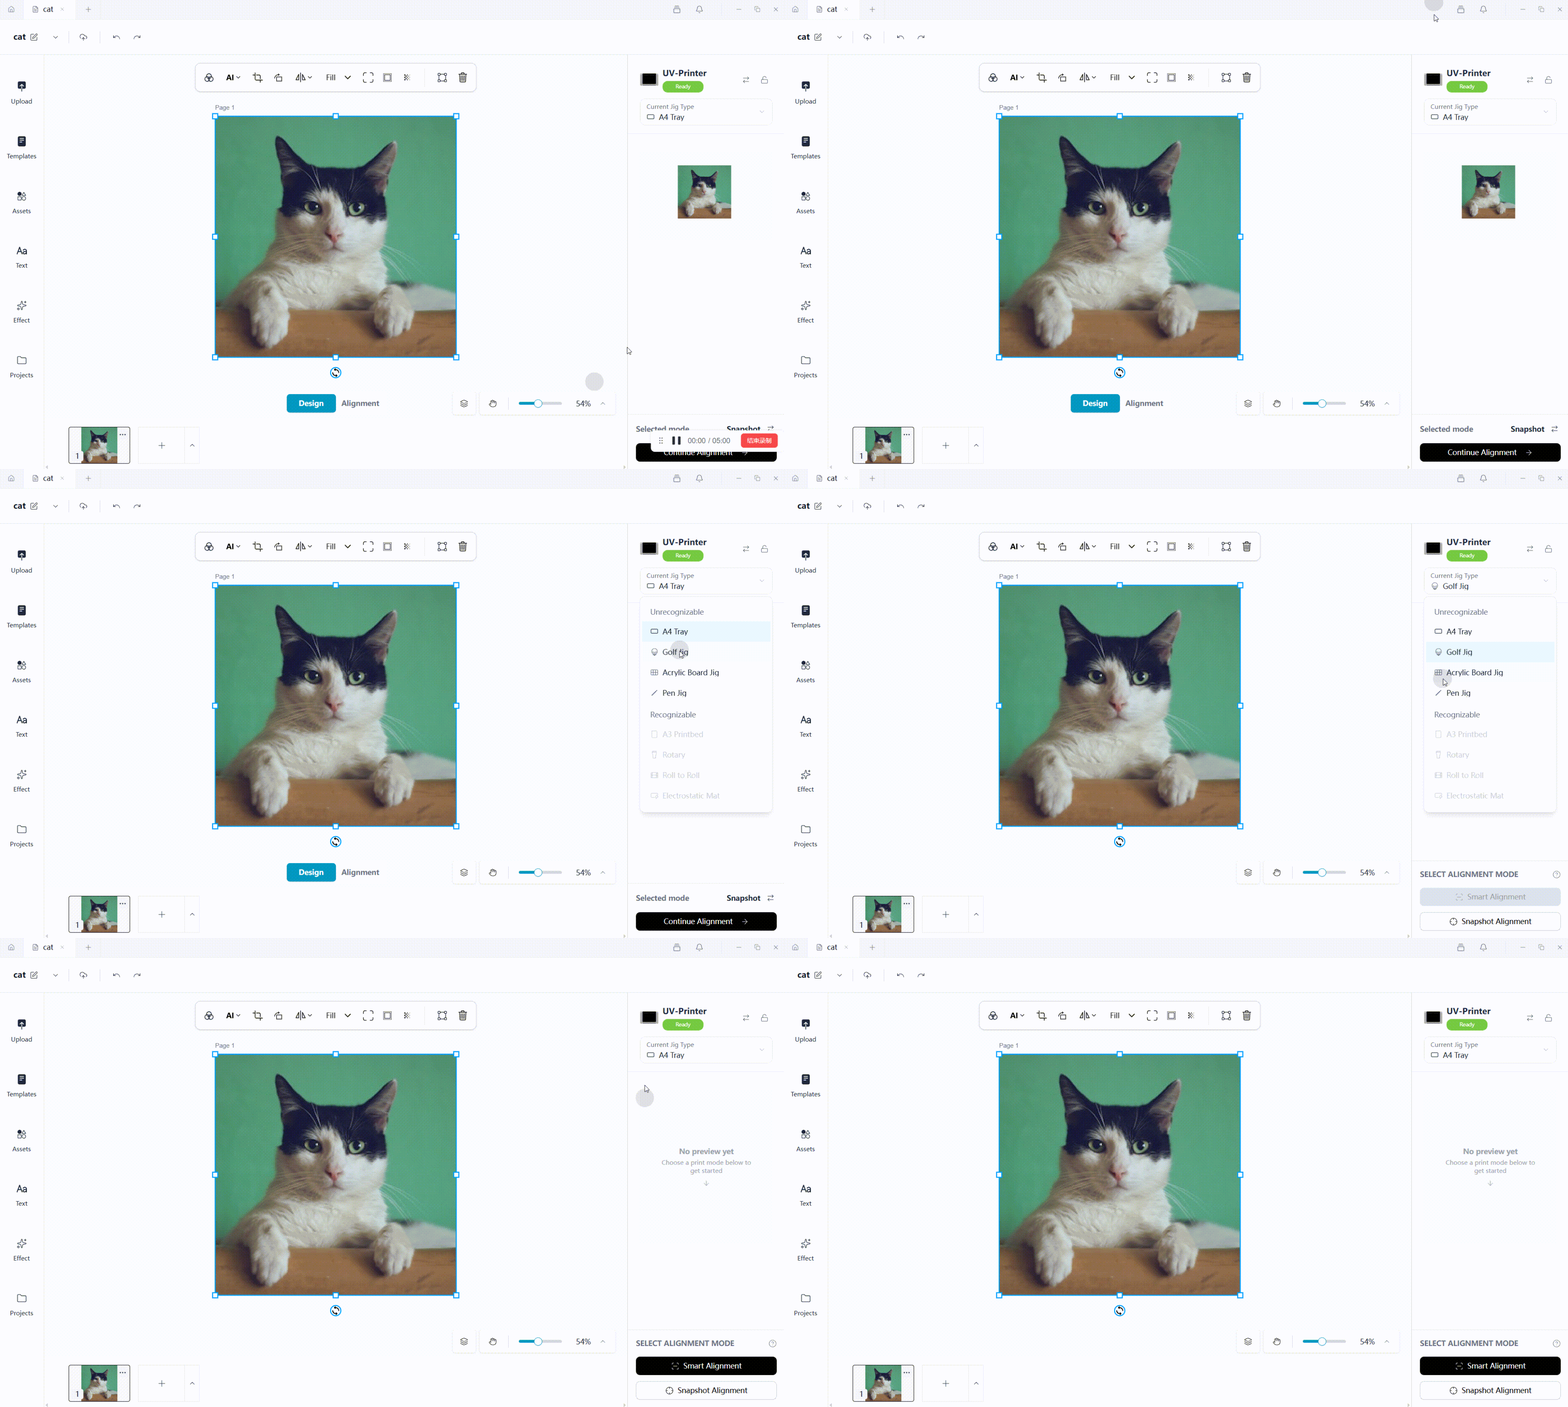
In the Jigs panel, select the jig currently installed in the printer.
Available options include:
- A4 Tray
- A3 Printbed
- Electrostatic Mat
After selecting a jig, confirm that the outline displayed on the canvas matches the installed jig.
¶ 7. Use the A4 Tray
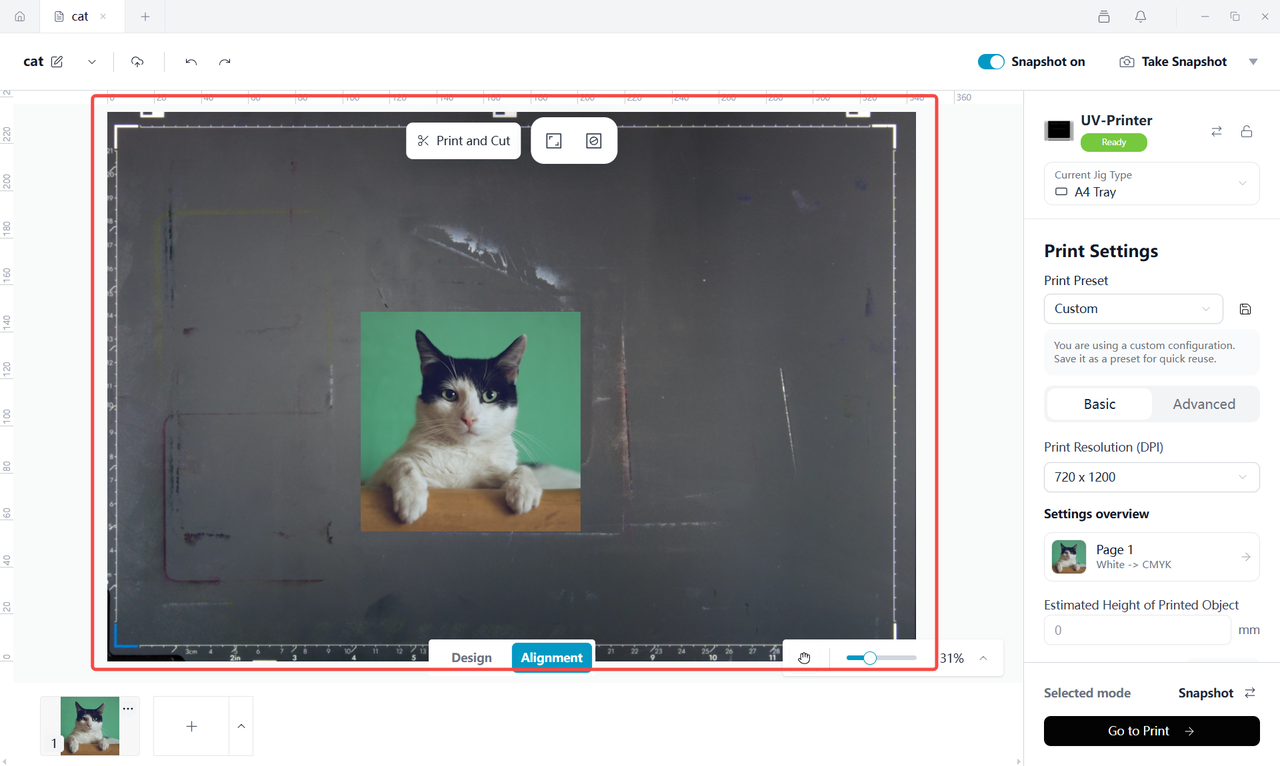
After selecting A4 Tray, the Alignment canvas displays the printable area of the A4 tray.
Before printing, verify that:
- The A4 Tray is installed.
- The artwork is completely inside the printable area.
- The artwork orientation matches the intended print direction.
- No part of the artwork extends beyond the tray boundary.
¶ 
¶ 8. Use the A3 Printbed
After selecting A3 Printbed, the Alignment canvas displays the printable area of the A3 printbed.
Before printing, verify that:
- The A3 Printbed is installed.
- The artwork is inside the printable area.
- The artwork orientation matches the intended print direction.
- Large artwork does not extend beyond the printbed boundary.
Note
The A3 Printbed is automatically detected by the printer. Manual selection is usually not required.
¶ 9. Use the Electrostatic Mat
After selecting Electrostatic Mat, the Alignment canvas displays its printable area.
The Electrostatic Mat is designed for thin, lightweight, or flexible materials that require additional holding force during printing.
Before printing, make sure that:
- The Electrostatic Mat is installed.
- The electrostatic indicator is green, indicating that electrostatic adsorption is enabled.
- The material is completely attached to the mat.
- The artwork is inside the printable area.
- The artwork does not extend beyond the mat boundary.
- The material edges are flat and not lifting.
Note
The Electrostatic Mat is automatically detected by the printer after installation. Manual selection is usually not required.
¶ 10. Position the Artwork
After selecting the appropriate jig:
- Select the artwork.
- Drag it to the desired position.
- Adjust its size and rotation as needed.
- Zoom in to check the artwork edges.
- Confirm that the entire artwork remains inside the printable area.
¶ 11. Final Check Before Printing
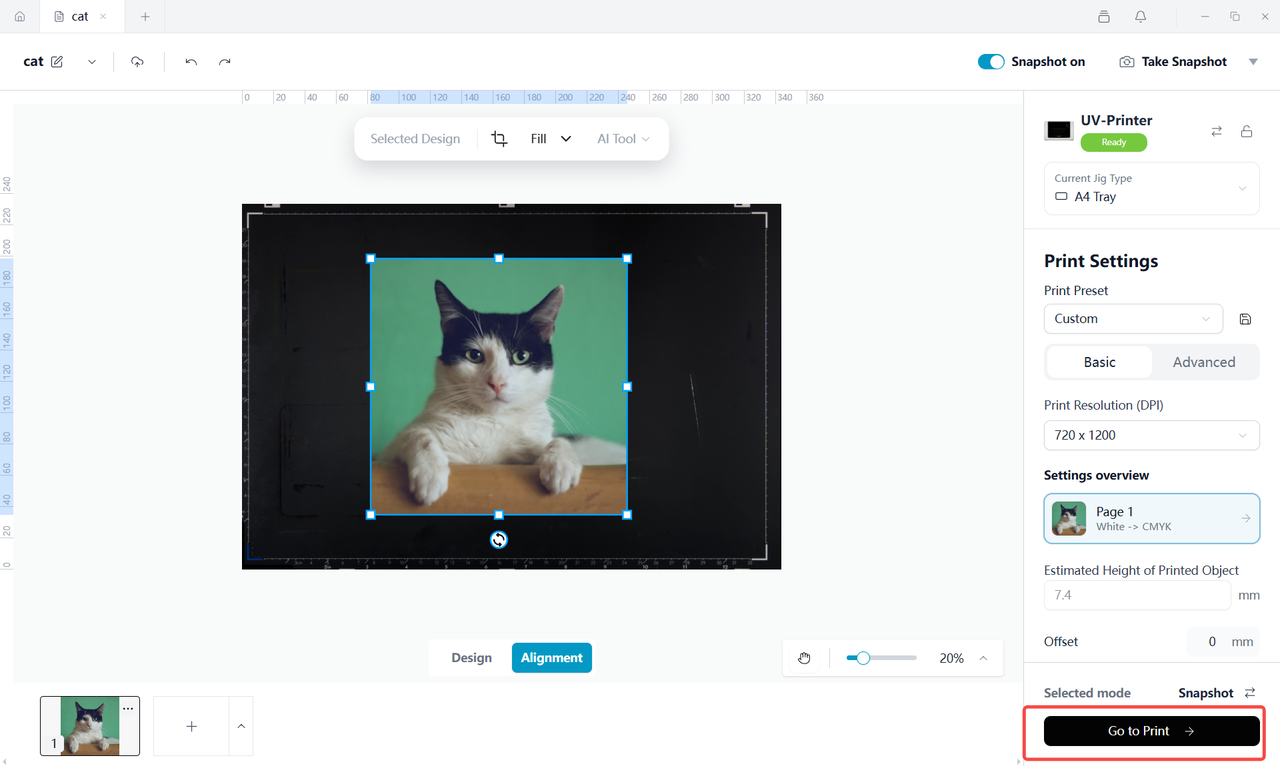
Before clicking Print, verify that:
- The selected jig matches the installed jig.
- The jig orientation is correct.
- The artwork is completely inside the printable area.
- The artwork does not exceed the print boundary.
- The object or material is securely positioned.
- When using the Electrostatic Mat, the material is firmly attached without lifting or movement.
- The object height provides sufficient clearance for safe printhead movement.
 |
 |
¶ 12. Related Print Settings
| Section | Setting | Description |
|---|---|---|
| Basic | Print Resolution (DPI) | Controls the print resolution. Higher values generally produce finer detail. |
| Estimated Height of Printed Object | Displays the detected height of the object on the printbed. The maximum supported object height is 168 mm. | |
| Offset | Adjusts the working distance between the printhead and the object after automatic height detection. Adjustable within ±1 mm. The available range may vary with firmware versions. | |
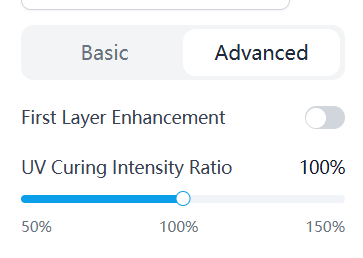
| Advanced | First Layer Enhancement | Improves adhesion and stability for high-relief printing. |
| UV Curing Intensity | Adjusts UV curing intensity from 50% to 150%. |
¶ Frequently Asked Questions
¶ Why did I select the wrong A4 or A3 jig?
Return to the Jigs panel and select the jig that matches the installed printbed.
Always make sure the selected jig matches the physical jig before printing.
Note
The A3 Printbed and Electrostatic Mat are automatically recognized by the printer after installation, so manual selection is generally unnecessary.
¶ What should I do if the material lifts on the Electrostatic Mat?
Stop the printing process before continuing.
Then:
- Reposition the material so it lies flat.
- Press the Electrostatic button on the lower-right corner of the mat until the indicator turns green.
- Confirm that the material is firmly attached.
- Perform Alignment again before printing.