¶ 1. Overview
This guide explains how to use the Electrostatic Mat in Morpho Studio for printing.
¶ 2. What Is the Electrostatic Mat?
The Electrostatic Mat is a dedicated jig designed to hold lightweight and flexible materials, such as paper and film, flat during printing.
It uses electrostatic attraction to prevent thin materials from curling or shifting. When the Electrostatic Mat is selected, Morpho Studio displays its reference area on the Alignment canvas to help you position your artwork within the printable area.
¶ 3. Recommended Applications
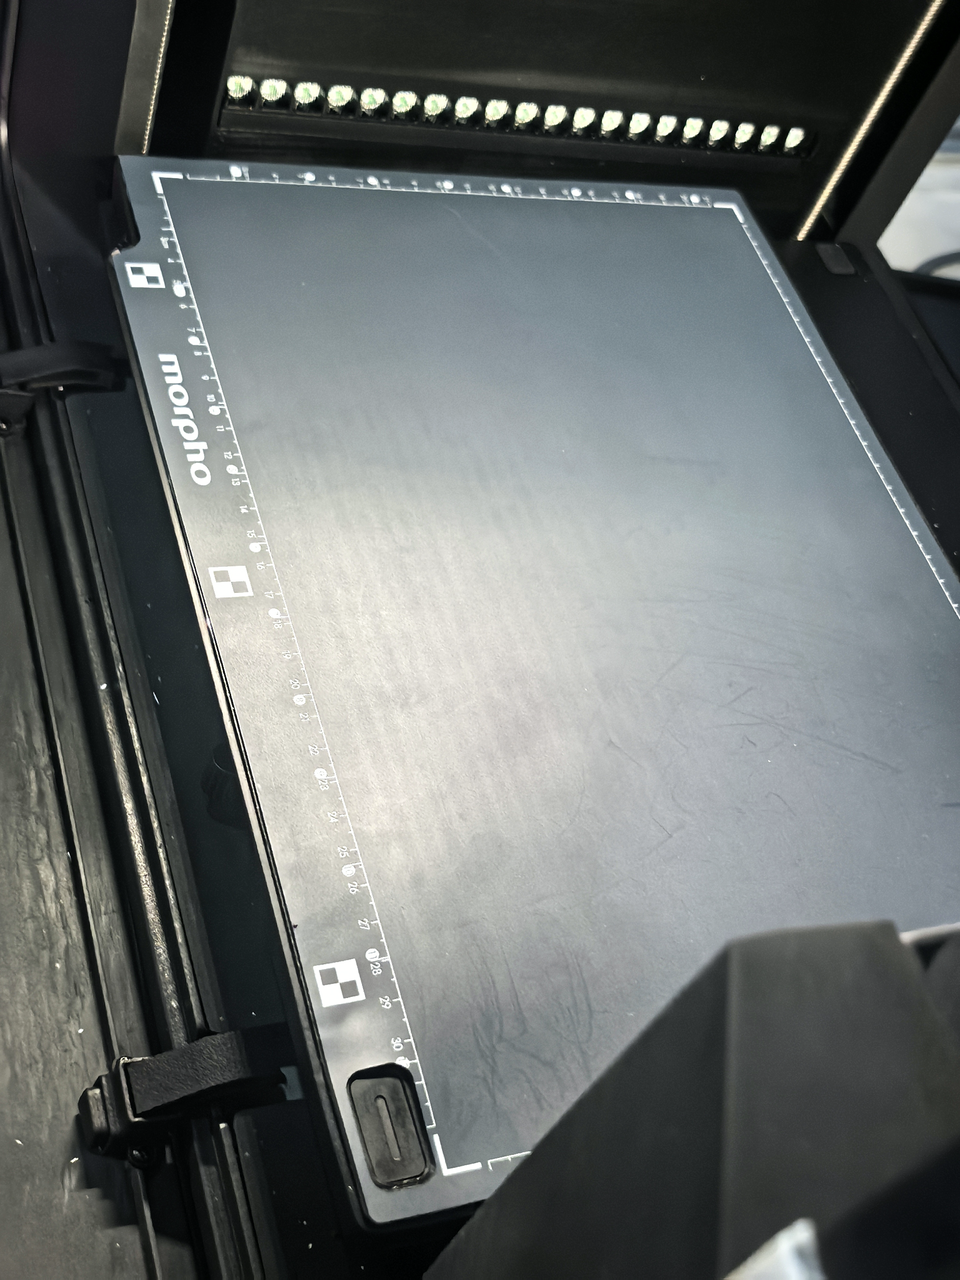
The Electrostatic Mat is recommended for:
- Paper printing
- Thin plastic sheets
- Films
- Other lightweight materials that are prone to curling or movement
¶ 3.1 Factors That Affect Holding Performance
Holding performance varies with the material's electrical properties, structure, and surface condition. The Electrostatic Mat usually works best with thin, flat, dry, dense sheet materials that make broad contact with the mat.
| Factor | Effect on Holding Performance |
|---|---|
| Electrical properties | Conductive materials or conductive coatings may respond differently from nonconductive sheet materials and may not hold as securely. |
| Flatness, porosity, and contact area | Flat, dense sheets make more continuous contact with the mat. Woven, porous, textured, or curled materials can leave air gaps or contact the mat unevenly, which can reduce holding force. |
| Thickness and stiffness | Thick or stiff materials may not conform closely to the mat, which can reduce holding force. |
| Coatings and backing layers | Release coatings, adhesive layers, plastic films, texture, or curl can reduce contact, even when two materials look similar. |
| Moisture and surface contamination | Moisture, dust, oil, adhesive residue, and fingerprints can make holding performance less consistent. |
Note: Differences in holding performance between materials are expected. A material-specific difference alone does not indicate a problem with the Electrostatic Mat.
¶ 4. First-Time Setup
¶ 4.1 Apply the Protective Film
Before using the Electrostatic Mat for the first time, carefully apply the electrostatic protective film included in the package.
The protective film is required for:
- Jig initialization
- Calibration
- Protecting the Electrostatic Mat surface during printing
¶ 4.2 Install the Electrostatic Mat
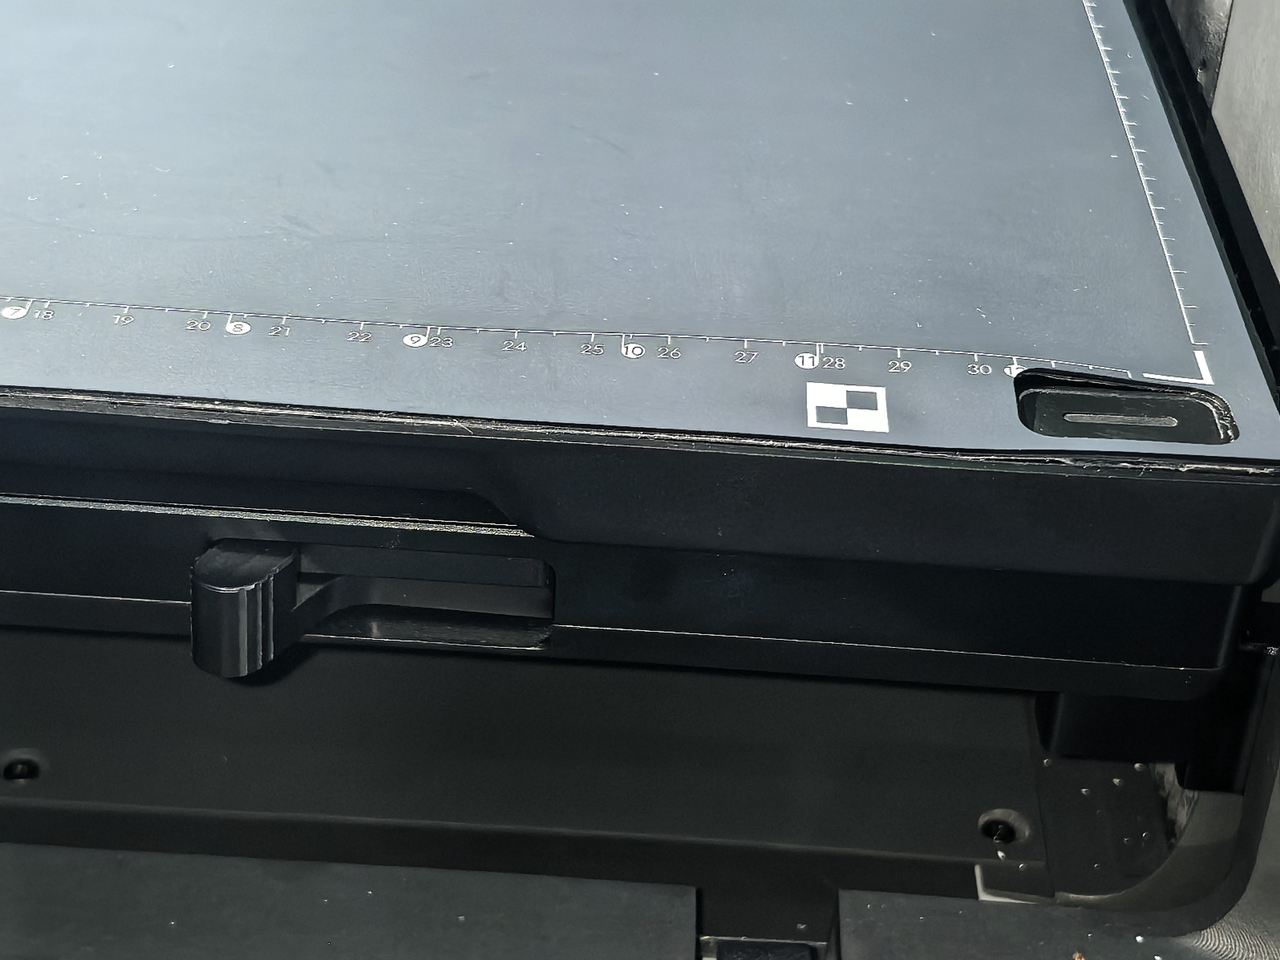
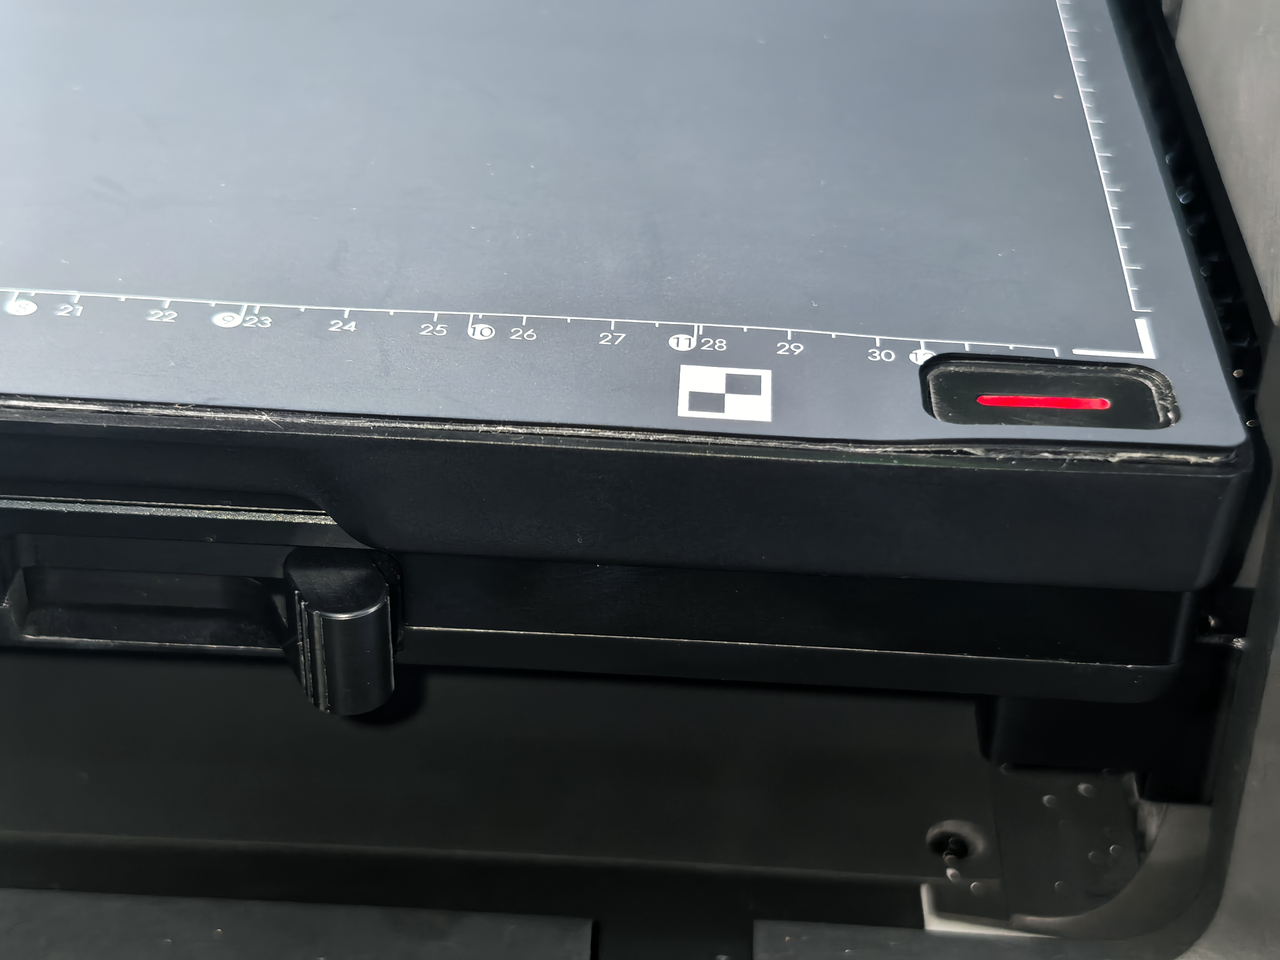
Secure the Electrostatic Mat onto the printer.
- Locate the locking latch on the side of the base plate.
- Lock the latch from left to right.
- When installation is complete, the indicator at the lower-right corner of the Electrostatic Mat turns solid red, indicating that power is connected.
 |
 |
¶ 4.3 Enable Electrostatic Adsorption
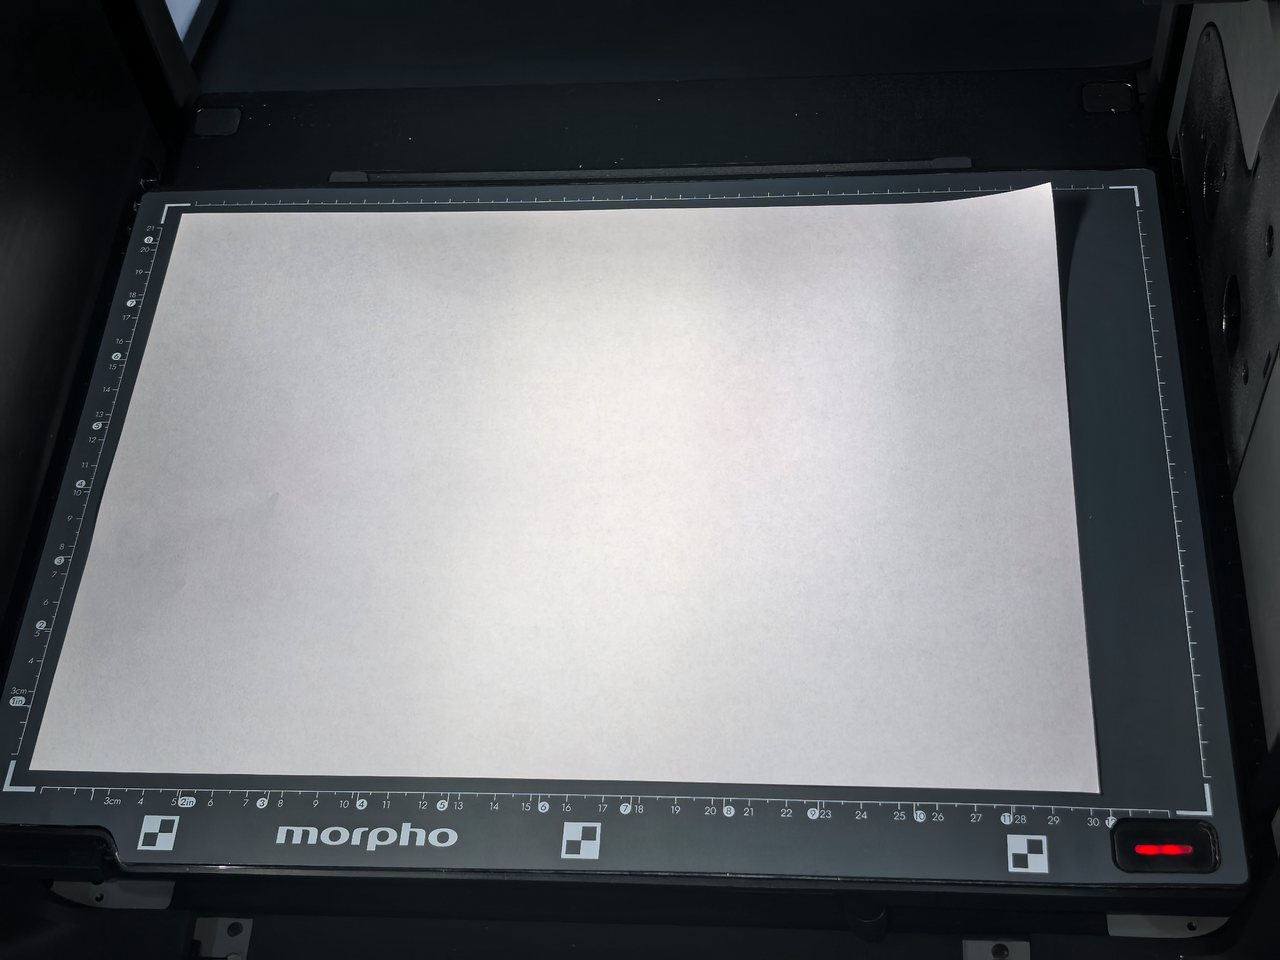
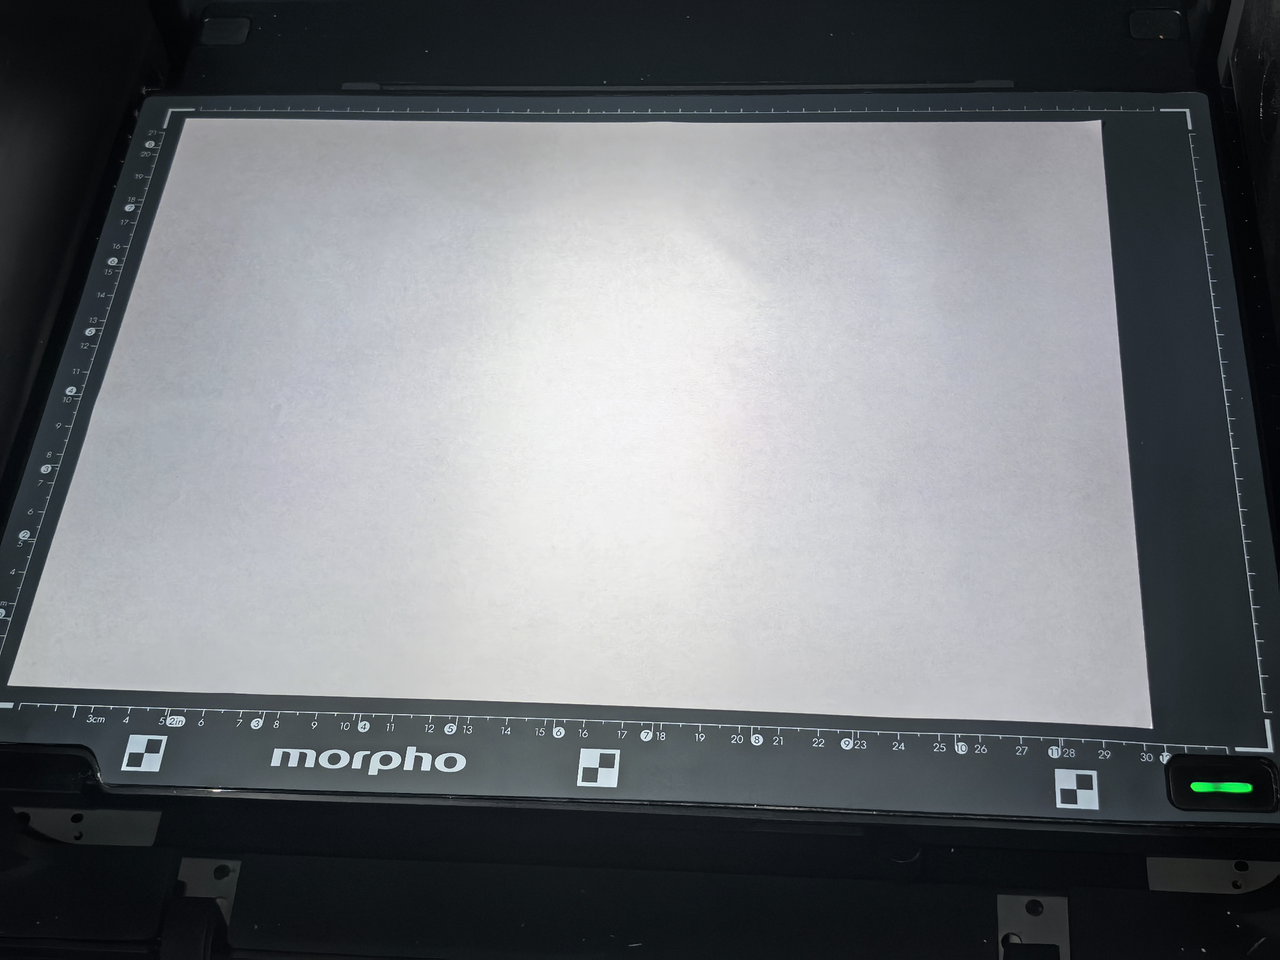
- Place the paper or film onto the Electrostatic Mat.
- Press the button with the red indicator.
- When the indicator changes to green, electrostatic adsorption is enabled.
The material will be held flat against the mat.
 |
 |
¶ 4.4 Initialize the Jig
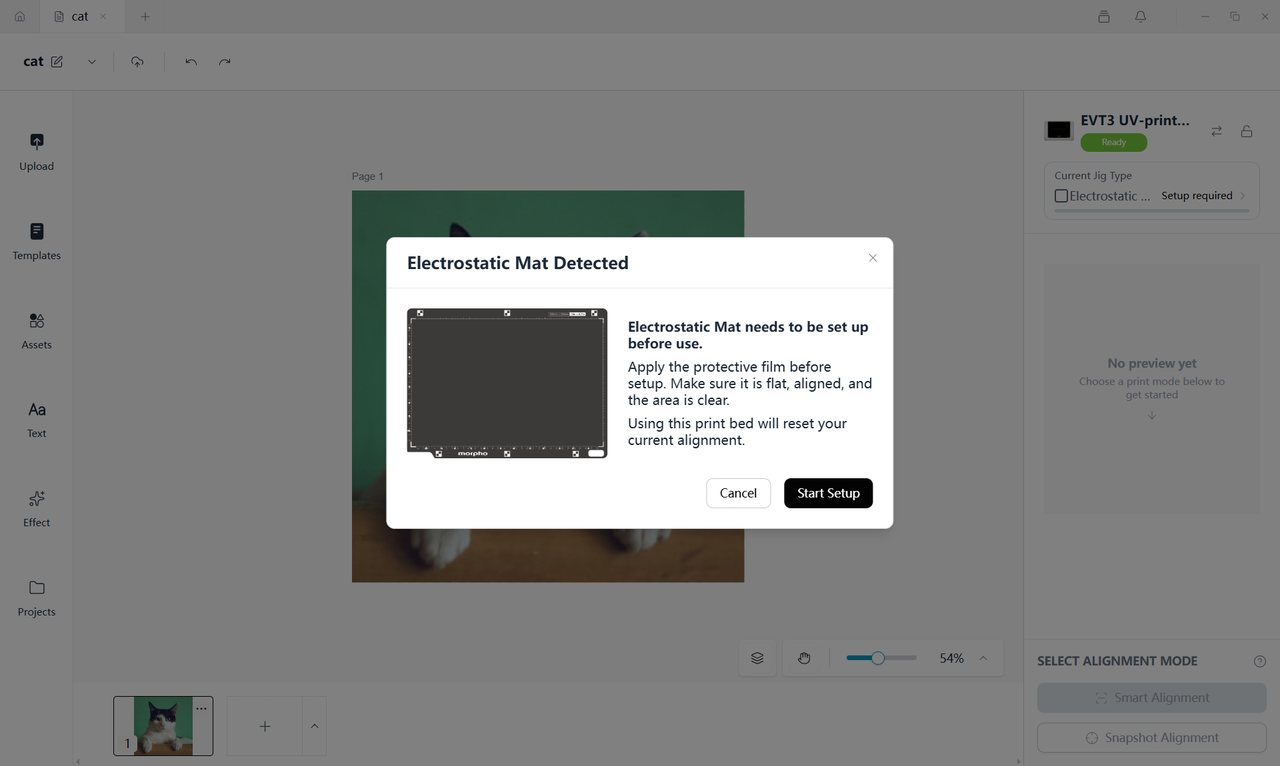
The Electrostatic Mat must be initialized before first use.
- Click Setup Required.

- Follow the instructions in Morpho Studio to complete initialization.
 |
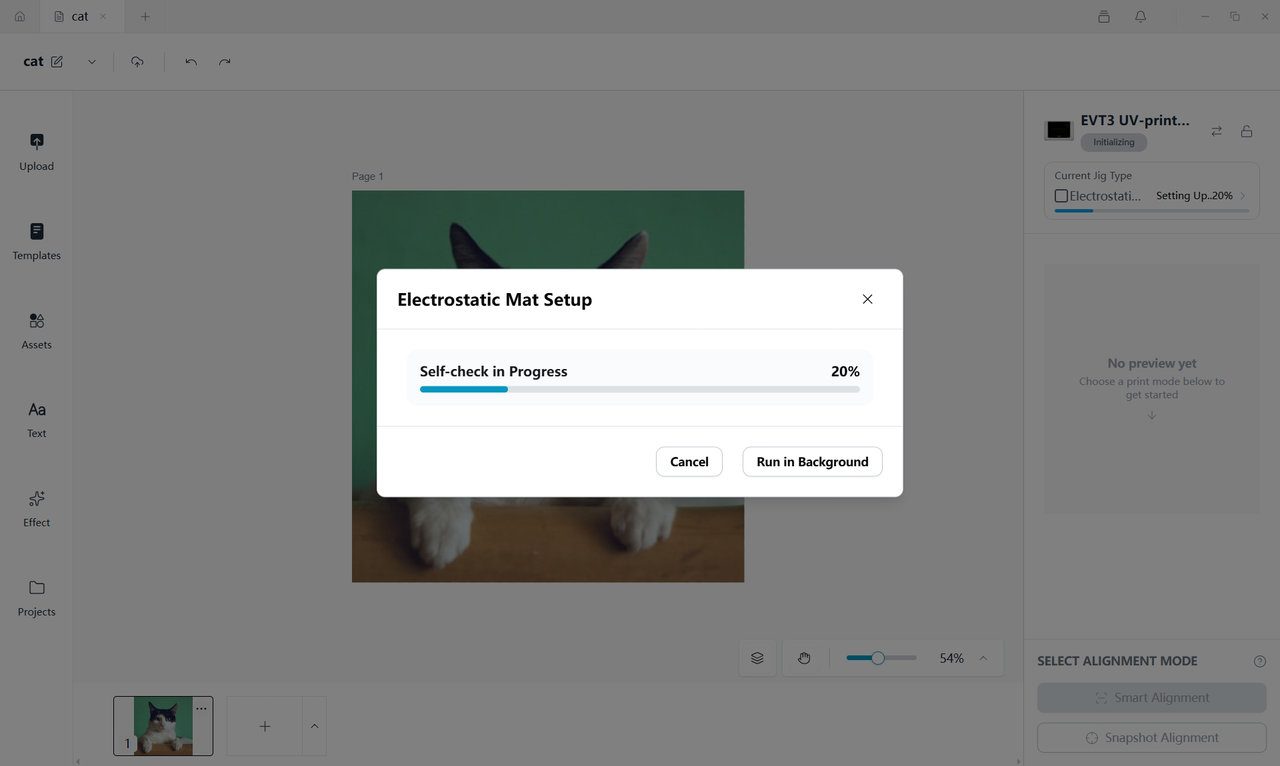 |
- When initialization is complete, the Electrostatic Mat is ready for use.
Note
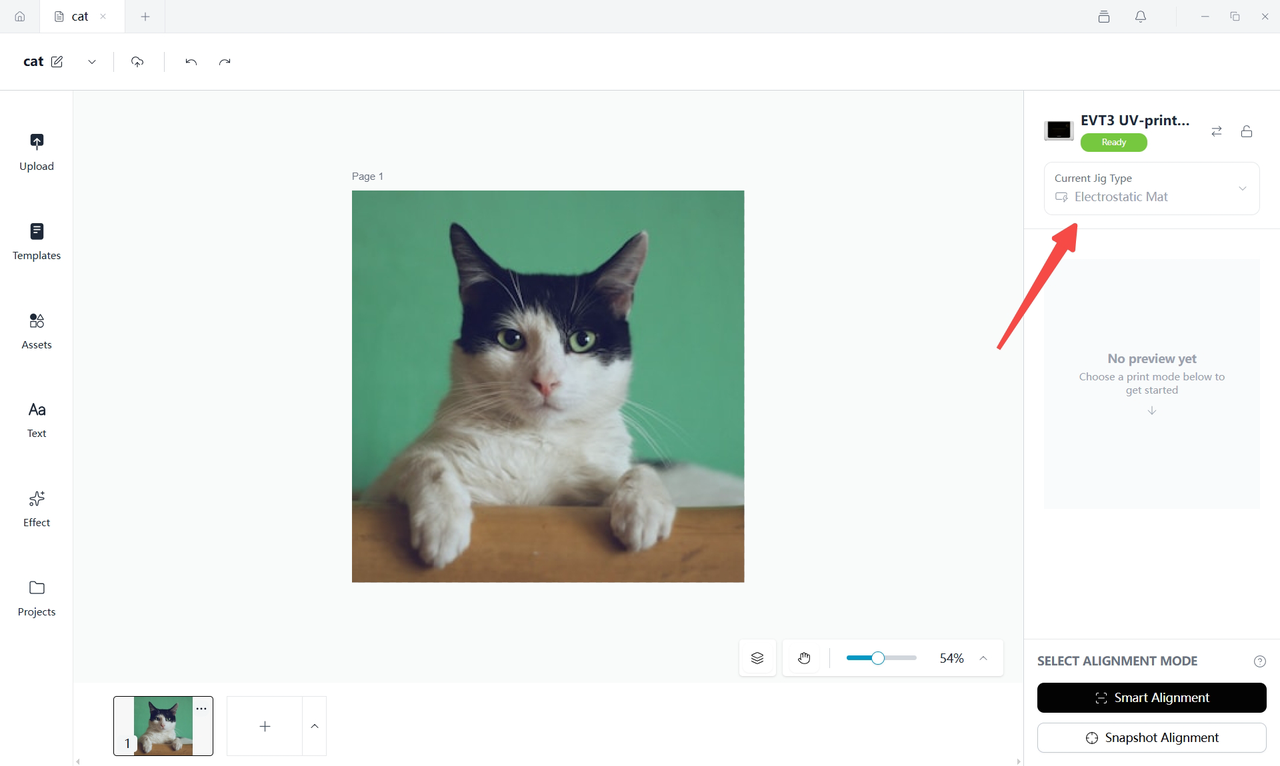
Like the A3 Printbed, the Electrostatic Mat is an automatically recognized jig. After it is installed and locked, Morpho Studio detects it automatically. The selected jig cannot be changed manually while it is installed.
¶ 5. Before Printing
Before starting a print, make sure that:
- The installed jig is Electrostatic Mat.
- The Electrostatic Mat is properly installed.
- The material is securely attached to the mat.
- The material lies completely flat.
- The design is inside the printable area.
- The design does not extend beyond the Electrostatic Mat boundary.
- The combined height of the material will not interfere with printhead movement.
¶ 6. Alignment
Notice
The current version supports the Electrostatic Mat only in Zero-Point Alignment.
Snapshot Alignment and Smart Alignment will be supported in future releases.
¶ Step 1. Enter Zero-Point Alignment
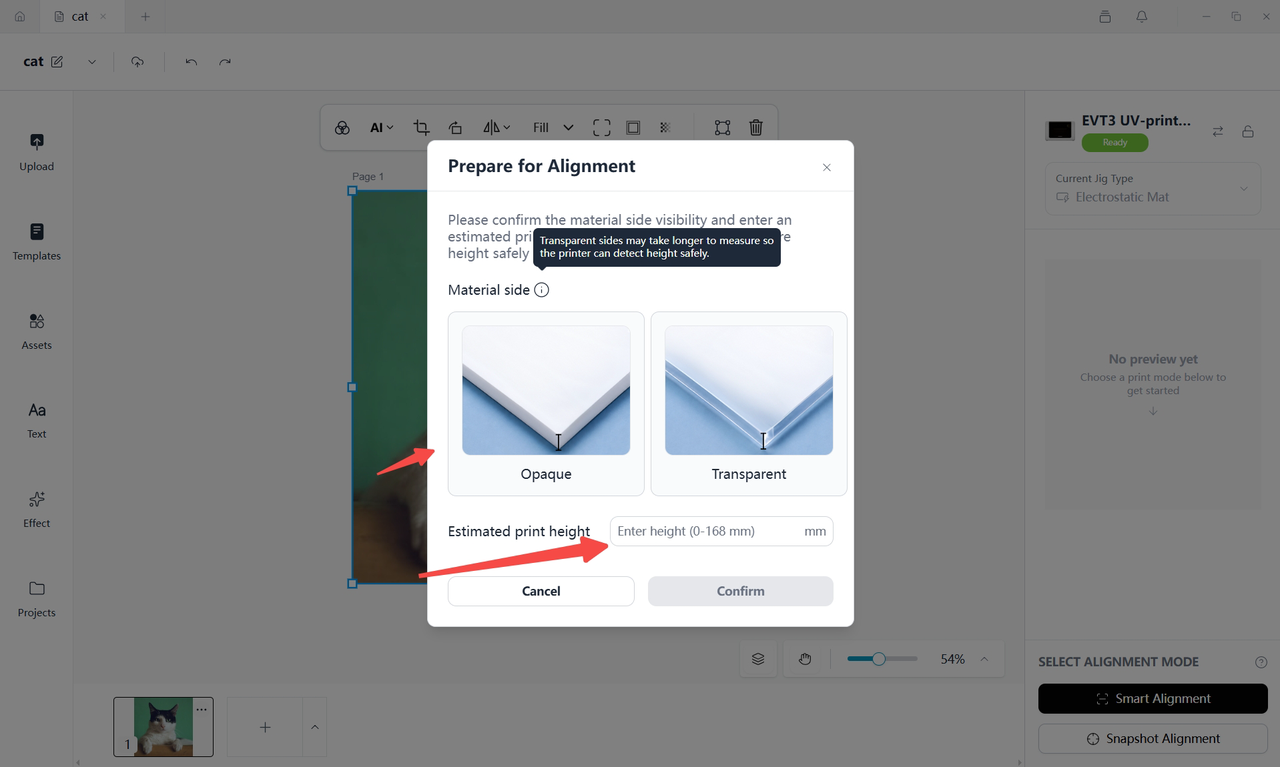
Select Snapshot Alignment.
A preparation dialog for Zero-Point Alignment appears.
Enter:
- Whether the material is transparent.
- The estimated material height.
The estimated height does not need to be exact. It is used only to speed up height measurement.
¶ Step 2. Complete Height Measurement
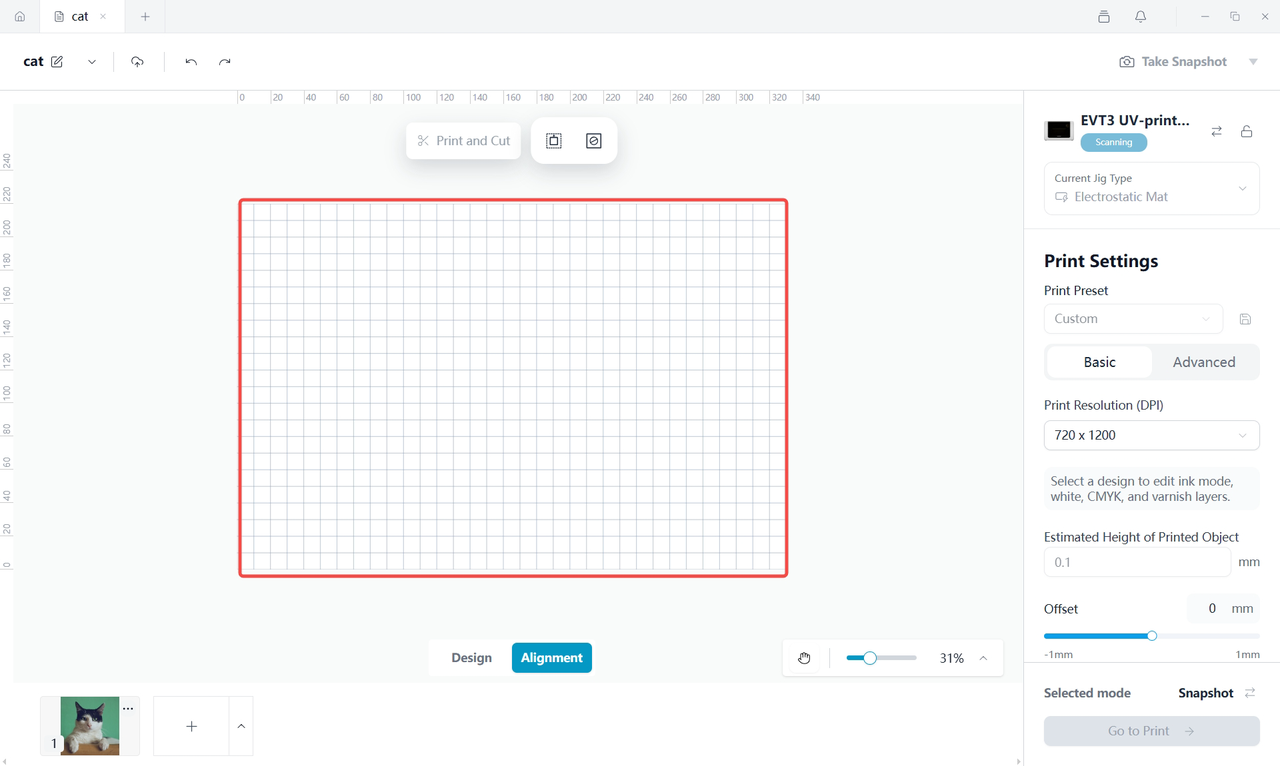
Click Confirm.
Morpho Studio enters the Alignment page while the printer performs automatic height measurement.
Place your design within the highlighted printable area.
¶ Step 3. Adjust the Design
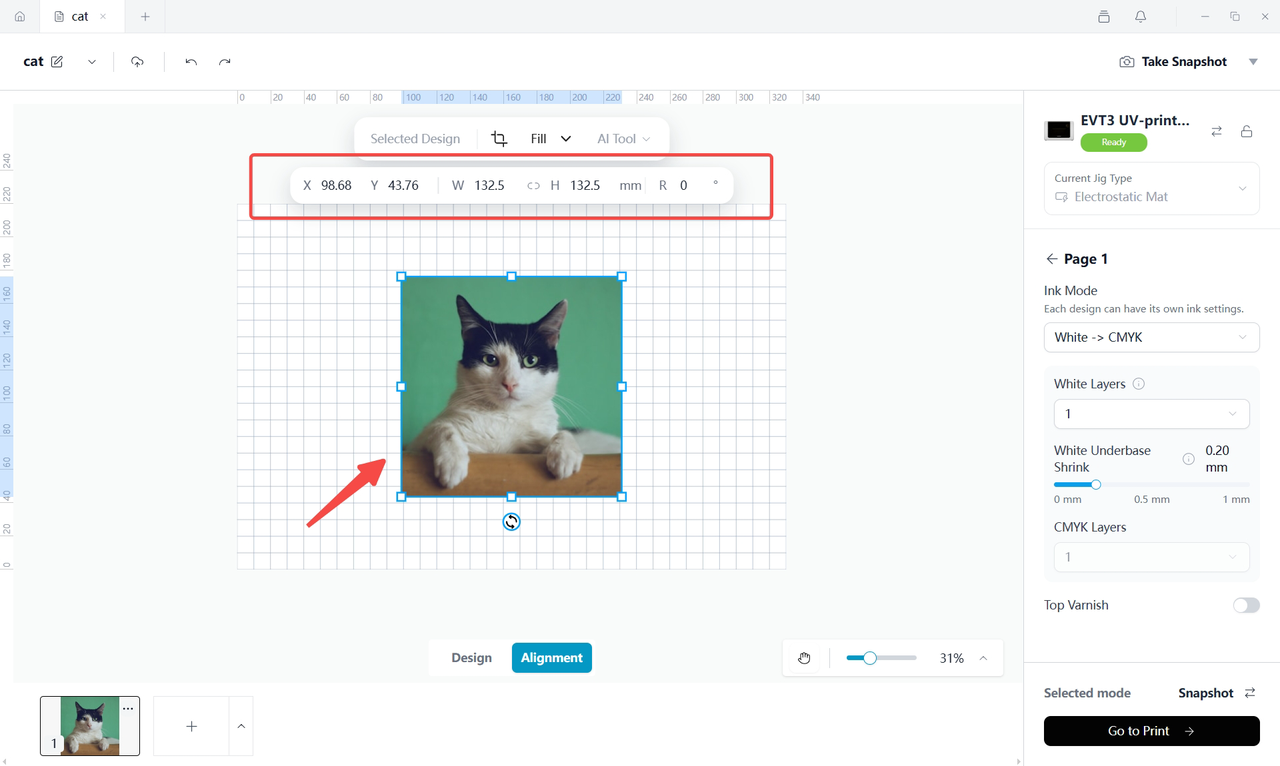
Adjust the following parameters as needed:
- X Position
- Y Position
- Width
- Height
- Rotation
¶ Step 4. Go to Print
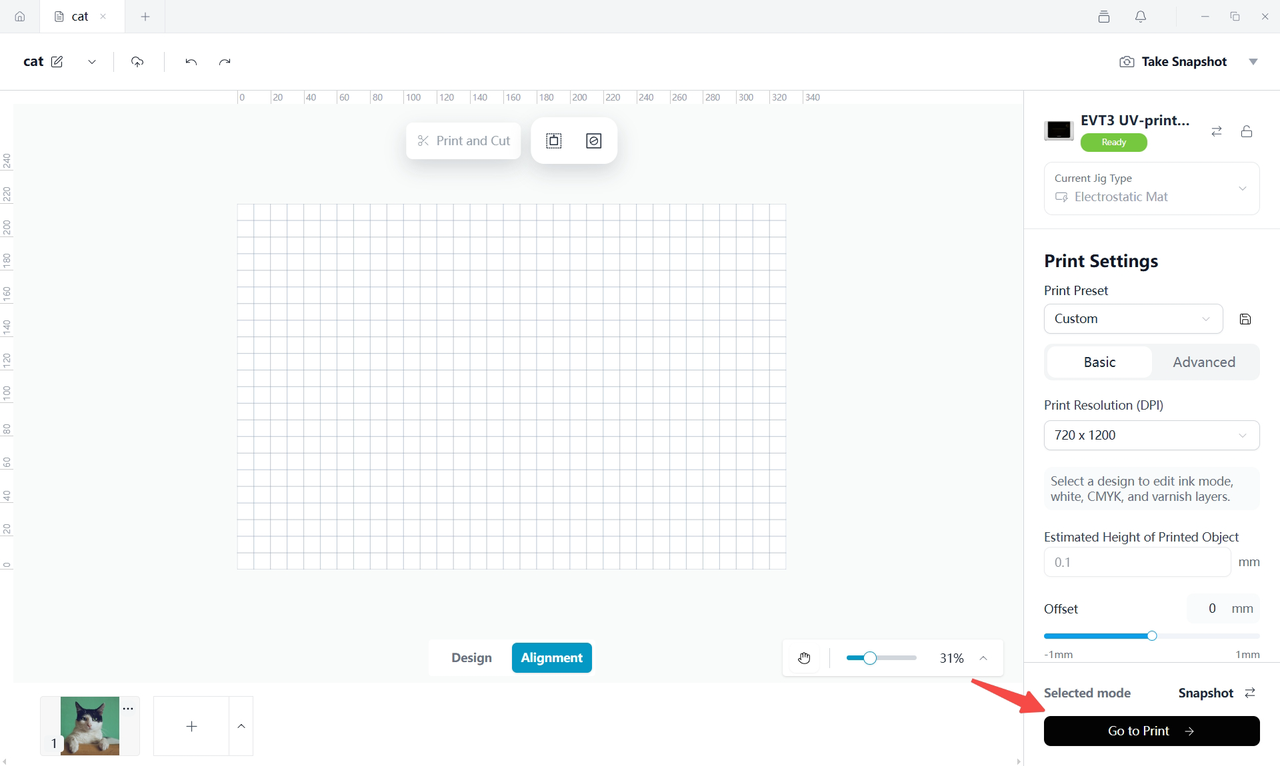
After confirming the design placement, click Go to Print.
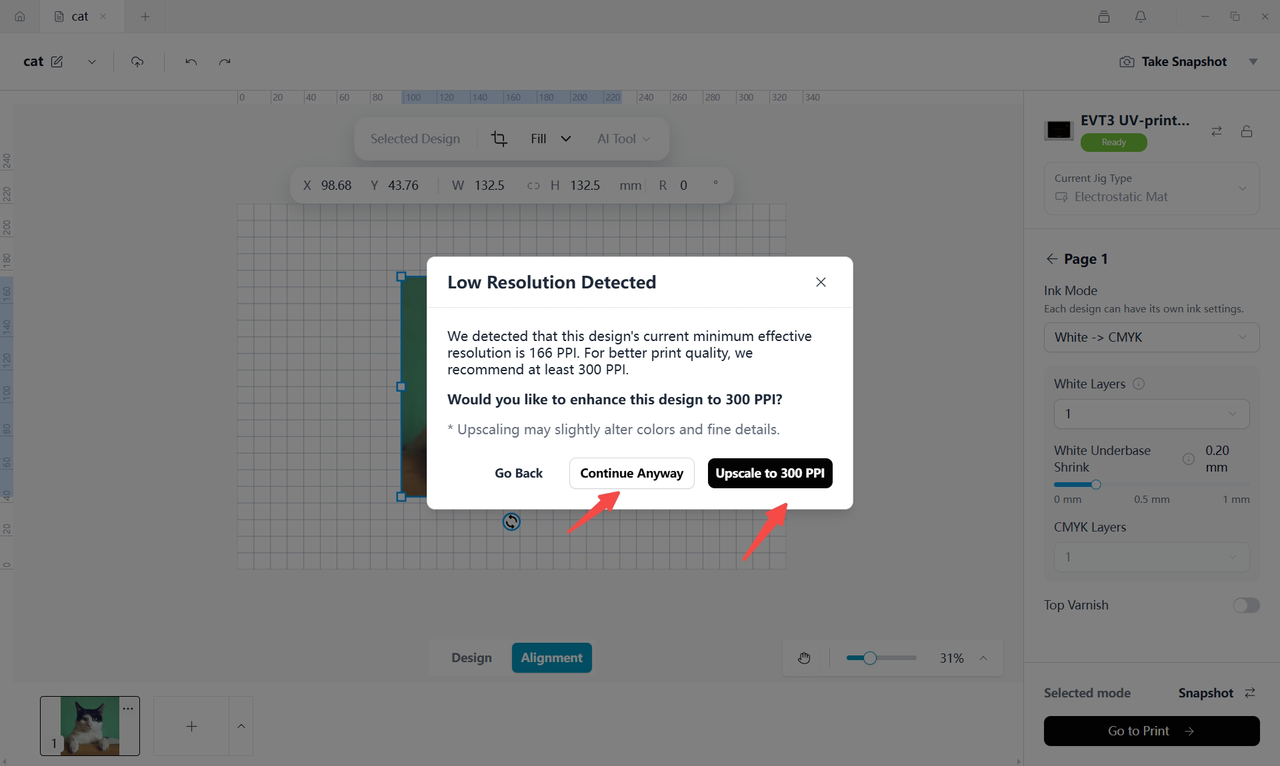
¶ Step 5. Review Image Quality
You can optionally enhance image quality before printing, or keep the current settings.
¶ Step 6. Start Printing
The Print Preview page displays:
- Estimated ink consumption
- Estimated printing time
Review the information, then click Start Print.
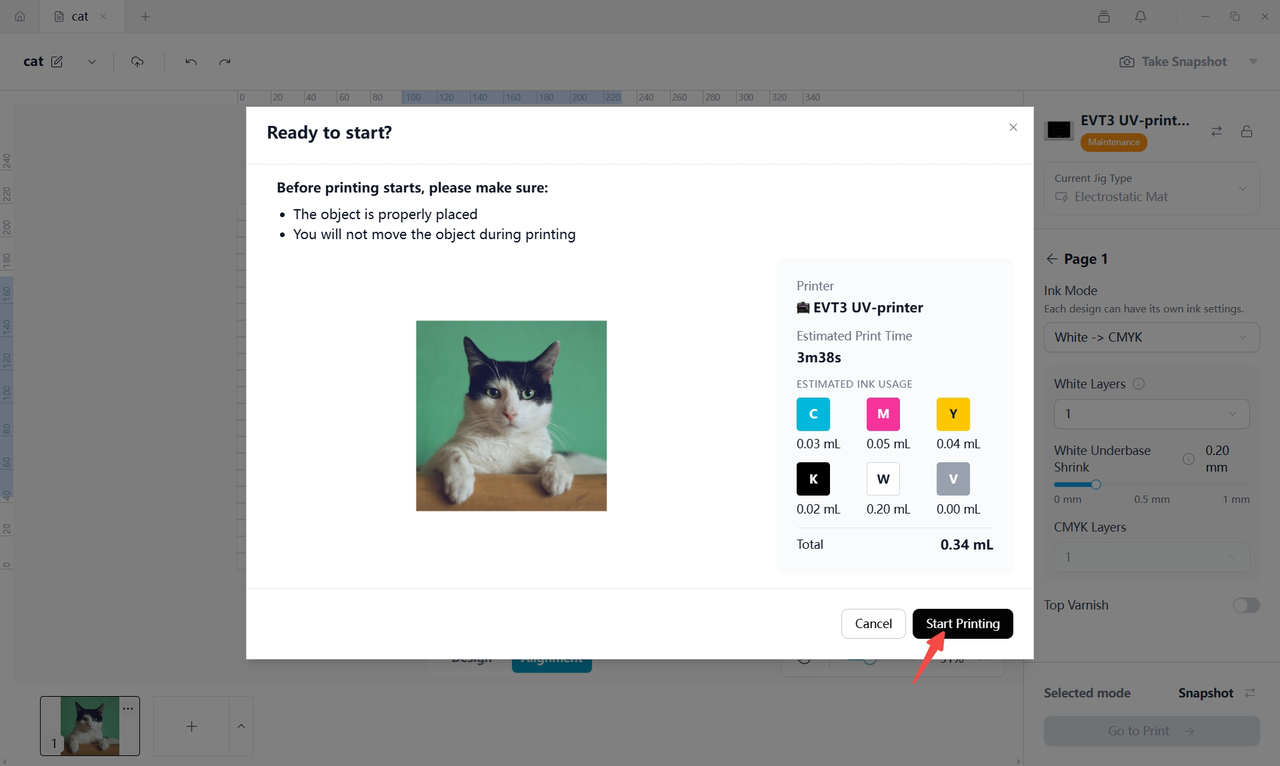
Your print job will begin.
¶ 7. Frequently Asked Questions
¶ Why can't I see the Electrostatic Mat outline?
Check that:
- The locking latch is fully secured.
- The red power indicator is illuminated.
¶ What Should I Do if the Material Does Not Stay Flat?
Stop preparing the print.
- Confirm that the material is thin, flat, dry, and in broad contact with the Electrostatic Mat.
- Check for curl, texture, porous areas, coatings, moisture, dust, oil, fingerprints, or adhesive residue.
- Flatten and reposition the material.
- Confirm that the material stays flat before continuing Alignment or starting the print.
If the material still does not stay flat, use another holding method that has been confirmed for the material and print setup.
¶ What if my design extends beyond the material?
Reduce the design size or move it until the entire design is inside the printable area.
¶ What is recommended for first-time users?
Use ordinary paper or scrap material for your first test print.
Confirm that:
- The material is securely attached.
- The design position is correct.
- The print orientation is correct.
After verifying everything, proceed with your final material.